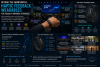
Video Gallery
Table of Contents
ToggleThe Video Gallery of Video Switchers is appended below:
1. Introducing the Roland V-160HD Streaming Video Switcher
Manage any modern production with a feature-packed V-160HD. Setting the standard in hybrid event switchers, now it's easy to create engaging, tailored content for both online and in-person event attendees. The V-160HD has all the I/O you need to produce almost any event. With eight SDI, and eight HDMI inputs, and seven assignable outputs across SDI, HDMI, and USB-C streaming, you can seamlessly feed program displays, AUX monitors, multi-viewer producer displays, and online streams. With a 40-channel digital audio mixer, blending signals from all 16 video inputs, plus microphones and line-level devices has never been easier. Also, play music with a simple Bluetooth audio connection to the V-160HD. Newly designed macro automation allows single operators to manage dozens of show cues used with the push of a button. Program scenes ahead of time and trigger them using the sequencer function. And with hands-on controls, you can trigger simple or complex cues, including input switching, camera presets, timed effects and layer animations. Use the PTZ cameras that fit your budget with built-in support to directly control popular camera brands and models. You can operate up to 16 PTZ cameras at once without a dedicated camera controller. With dedicated top- panel controls, you'll have faster and more precise control over the powerful eight-layer effects engine. Now, there's no need to scroll through menus. Four of the effects of the V-160HD can be used as picture-in-picture windows or as keyers. The other two are dedicated to the powerful downstream keyers with alpha and external key capabilities for titles with gradients and transparencies. You can also connect to and control from a Mac or PC over LAN or USB plus configure settings remotely with a tablet via Bluetooth. The feature-packed V-160HD creates a unique hybrid experience that empowers single operators to engage both live and online audiences.
2. Review: Sprolink NeoLIVE R2 HDMI video switcher / mixer
3. The 5 Best Video Switcher In 2022 Reviews
what's up guys in this video we will look at the top 5 best video switcher on the market right now we made this list based on our personal opinion hours of research and customer reviews we've considered their quality durability features and more if you want more information and updated pricing on the products mentioned check the links in the description box below so let's dive into the video number five te smart 3 in one HDMI switcher te smart brand has several electronic video components that are highly sophisticated and amazingly budget-friendly the video switcher from this brand that you can see is a perfect choice for setting up home theater or gaming you can connect up to three input devices to this switcher's single output display which means you can have an amazing immersive viewing experience the switcher supports high definition resolution up to 4K along with which it also supports prominent features such as Dolby Vision Direct hdcp HDR deep color and 3D TV the combination results in high quality pictures with great detail the switcher features an automatic input source detection which means it automatically switches to the latest plugged in input device all ports of this switcher support the CEC function which allows a convenient communication medium between two or more connected devices number four black magic design atem video switcher Blackmagic is the company dedicated to give you quality and stability their products Focus your needs most worldwide famous for its unbeatable codex it gives you affordable high-end quality editing workstations Blackmagic is the only brand which designs production switchers for broadcasters in a b professionals like you this production switcher allows you to do multiple things like live production streaming episodes and web shows on platforms like TV after recording you can also do the live coverage of any video games competitions that you are hosting your Blackmagic design video switcher is an 8 input live production switcher with integrated control panel this eight input consists of four SDI inputs and four HDMI inputs to facilitate every kind of input option you have both types of inputs support SD and HD resolution from 720 PSD to 1080p HD from any camera you have to facilitate your switching it shows you all the eight videos captured on a single TV screen number three Roland professional a vv1 HD HD video Switcher Roland's professional video switcher gives you four HD inputs to connect your cameras with it it will not be wrong to say that this is one of the best choice for you if you are searching for a portable HD video production Switcher the best thing about this brand is it provides you with frame buffer or TBC technology using which you can easily prevent your input devices from getting gen locked together you get to select your working resolution easily and can carry out switching between your four input source manually with the help of its provided and built controls to further ease your efforts it provides you with electronic control by connecting to your desktop or any other device like an iPad using optional software your switcher also carries an audio mixer with 12 channels using which you can easily embed or to embed any audio signal from your HDMI device number two YOLO live YOLO Box portable Studio device your YOLO box switcher connects up to five video sources at a time you can connect them with it using Wi-Fi Ethernet or LTE you can also connect to internet using its RJ45 ethernet port or using cell service with an optional SIM card working as a switcher it is capable of producing picture-in-picture templates as well as graphic layers its built-in encoder allows you to go for live streaming which and you can further record your stream in the MP4 format to an optional SD card up to 128 gigabytes in size using its built-in SD card slot your yololiv YOLO Box video switcher supports LCD touchscreen control to let you easily switch between different videos to be broadcasted its large touchscreen display shows you the streaming image along with the input streams you also get to see control interface on the LCD display which in turn lets you switch between the video sources simply with a touch number one feel World video switcher the brand feel world has growing prominence in the digital world with its trustworthy appliances the video switcher from the brand is an ideal choice for filmmakers and video making enthusiasts due to its low-cost mind-blowing features the switcher comes with four HDMI inputs along with one HDMI output all of which support 1080p video resolution it features a 2-inch LCD that previews the feeding of four inputs altogether you can utilize its USB 3.0 interface for a live streaming facility with its classy special effects switching function and multi-signal control you can conduct live streaming smoothly also the USB 3.0 output can also be connected to a computer for faster production of several videos it as streaming software for all social media platforms you won't be needing any extra hand to set it up as the small and smart component can be easily fixed to a tripod thank you for watching guys I hope you liked the video If this video was helpful to you please remember to leave a like And subscribe my channel to see more videos like this if you have any questions related to these products you can leave a comment down below and I'll get back to you as soon as I can
4. What Does A Video Switcher Do? | Beginner Overview
5. Multi Camera Live Streaming – SIMPLE & POWERFUL Video Switcher
as a live streamer it is important to engage with your audience and also have them watch you want them to watch the entire length of your live stream video or if you pre-recorded like this youtube video you want them to watch as long as possible when it comes to live streaming one of the easiest way to add some dynamics to your video is to incorporate multiple camera angles so here at my home office i use multiple camera angles when i go and live stream if you're not following any of my live streams especially on amazon make sure that you follow me there and you can see multiple camera angles including a new element that i brought into my video production which just happens to be a camera slider so make sure that you check that out in the description below but when it comes to making live streaming easy with multiple cameras you want to really consider using a video switcher so i'm going to walk you through a switcher device here that i have from bzb gear shout out to them for not only providing this switcher but also providing the ptz camera that i'm going to use to demo this as well let's take a look at the specifics of this particular video switcher and why it's one of my favorites to recommend now this may seem like it's something simple but for me it's super important it's the ability to turn on and off your devices now the bzb gear switcher has an on and off button so that allows you to turn it on and off when you want versus having devices that may have to be plugged into a surge protector and left on all the time or you have to turn off the surge protector and it's that hard shut down and then that hard boot up process every time you go to use it now if you're brand new to live streaming and video production i don't want you to get overwhelmed by all the buttons that you see on a switcher i'm going to walk you through some of the basic functionality and why these are so important to make sure that you take your live stream to that next level without over complicating things now this particular switcher is an hdmi switcher so that means we want to use hdmi devices for it you don't want to use any type of usb webcams those are just not going to work now there are adapters out there for all my high techies but for you all that are watching this video i really want you to think about using hdmi compatible devices that's one less thing you have to troubleshoot if anything goes wrong another cool thing about using hdmi inputs for switcher is the fact that you don't just have to bring cameras into your production i also have my laptop plugged into this switcher so if i wanted to do any type of screen share i could do that as well and i also like to use an ipad device especially when i live stream on amazon live because sometimes i'll show products right on the screen or i'll even whiteboard using the app all of those devices are hdmi compatible which allows me to plug them into the switcher and go between those different devices and show those on air now along with being hdmi compatible this switcher also allows for two microphone inputs so if you have a 3.5 millimeter connection you can plug that directly into the switcher now there's a lot of questions around audio and everyone's audio setup is a little bit different so here are two use cases that you can do with this type of switcher the first use case is what i have set up right now which is a 3.5 millimeter connected directly into my microphone this particular microphone is my rode shotgun microphone so it's just one cable coming out of the microphone and being plugged into the switcher now that's going to work in most cases especially if you have a home office or smaller setup now for those of you all that have a little bit larger setup you're probably using some type of audio mixer as well this can still work with your switcher all you need to do is just come out of your switcher using a 3.5 a quarter inch whatever your setup is and just convert it over to 3.5 and plug it directly into this switcher once you plug into the switcher here you can still control the mute volume up and down but all the technical parts of your audio you would control from your audio mixer so you have multiple different ways to bring in audio into your production and i would highly recommend bringing in your video and audio into your switcher and having the person that's controlling the switcher do everything in one location versus trying to bounce back and forth between multiple now we're not going to get into every specific port and menu item on the switcher but there is one more thing that i definitely want to highlight this switcher has two hdmi outputs one for your program feed and one for your multi-view feed now why is this important because if you're live streaming you want to make things easy and if you're a one-person operation you definitely need to make things easy now unlike some other switchers on the market they don't have both a multi-view and a program out especially at the price point of this switcher now the multi-view function allows you to see all your inputs so that you can line up your next potential shot you're not going into it blind you can actually see all the camera angles or all the things that are connected at the same time in your multi-view it allows you to be prepared before you send your live program fee which is that second output the program feed some switchers at this price point only have a program feed and so you're kind of guessing what you're going to show so if camera 2 is not actually ready and you select camera 2 you may not get the picture that you want but if you have a program feed you can actually see what is going on in real time this is one of the most important features on a video switcher so make sure that you do consider that when looking to upgrade any part of your video switching system we've turned our device on using the on off button we plugged in our hdmi cameras and our computer and we've also plugged in our microphone the only other thing that we need to do is plug our switcher into our computer and this particular switcher does come with a usbc two usb connection that way you can plug it directly into your computer i'm gonna connect the switcher and bring it into my laptop with obs you can use any live streaming platform such as melon which has been a great sponsor for this channel or you can bring it into any type of video conferencing platform such as zoom so the choice is yours and now you're bringing in video dynamics to more than just a live stream you can bring it into anything that requires video and that's what's so cool about using a switcher how would you like to stand out from everyone else in a zoom meeting by bringing in multiple camera angles and being able to share your screen with a click of one button not a bunch of buttons we're all plugged in and we're ready to go now if you take a look here on the screen i'm just going to use one computer screen for this illustration for this video but i could potentially have two screens because like i talked about we have one video output that can be used for multi-view which is what you're seeing here and i could have another screen plugged up via hdmi that only shows the live program feed now for the multi-view you can also see the program if you don't have enough space for multiple monitors so on the far right here is our actual program feed and we can also see the preview of everything else that we have plugged in our ptdd camera is plugged in down here the camera that you're looking at me right now is plugged in right here on hdmi 2 and we also have our computer plugged into hdmi 3. so this makes it easy to see everything right here in the multi view now also on this particular screen this gives you a lot of options to see on screen now sometimes you may not want to use a secondary software this is the perfect solution because you can actually see all your controls in the bottom right corner of the screen now some of the things that get overlooked or things like your clock what time it is in different settings you can see your audio meters as well everything in one screen now this is an awesome way to look at everything in one setting again making things simple when you're live streaming is something that you definitely want to do so now let's bring our switcher into our obs production now i've already installed the obs software and made sure that i upgraded to the latest version i've also already created a scene called camera and i'll add a source video capture device and call it bzb gear select okay and the first option that i have is capture video which is my switcher and i'm going to select ok so now we have the vzb gear inside of our production camera one is currently showing which is my ptz camera which is up on the shelf camera two is my a6400 and then camera three is my laptop device so now we have all of our cameras and devices going to be able to be seen in our live production and all we did was take one cable connected from our switcher to our laptop we have just completely changed how we do a live stream adding more dynamics to our live stream by bringing in more cameras more devices and it allows you to not have a static shot now you can add some dimensions and elements to your shot now if you guys are getting value from this video make sure that you hit the thumbs up button and if you're not a subscriber to this channel go ahead and hit that red subscribe button as well now i really encourage you to check out the menu settings in this particular switcher because there are a lot of things that you can adjust and change now by default that we have on our switcher we have a buttons on the top and i don't want you to get confused by all the buttons because you're probably not going to use all of them especially if you're streaming at home or in a smaller live streaming setting but let's take a look at a few that will be important to you across the top here we have our microphone one and our microphone too so this will allow you to control both of those and you also want to make sure that your microphone audio levels are turned on now because we have the multi-view we can also see the levels that are coming in so we want to make sure that we're in the green and yellow and not peaking by going into the red and one of the ways that you can control your audio from peaking is by using the plus and the minus button of the volume controls right here on your switcher device just below that we have our buttons one two three and four which are our preview and our program buttons now currently we have our program set to camera one now i'm going to go ahead and change it to camera two so when i select camera two we see that our live output is camera two which is the camera over my shoulder but in our preview window we can see any device we want to see that is connected so my preview is looking at my ptz camera on the left hand side of me here and so if i want to switch to that camera then i already know what that shot looks like before i even go to it so i can make adjustments if i need to or if i had another shot ready to go such as computer screen and maybe i wanted to preset for that i can go ahead look at that make sure that it's ready to go before actually going live now when i'm actually ready to go live all i have to do is just call that on over so i'll select three from the program section and it will bring it onto my live screen and then i can go back to another live production in this case camera one and it makes it easy with the click of a button now you don't have to go in and make any configuration changes the way it's set up and the way i just showed you it's out of the box by default like that now this switcher also has a t-bar that allows you to control your switching along with your cut and your audio buttons that allow you to control the different types of fade effects that you have as well so i'll set up my preview for camera two and if i use the t-bar you'll see that i can cut and i can fade based on which setting that i have or i can use the buttons down here to cut and fade between the two options that i have so you have a lot of different effects when it comes to these switchers as well not the most important part of why you're using a video switcher but it does add again more dynamics to your video now if you're ready to take it to the next level like i mentioned earlier you can manage a lot inside of the switcher inside of their menu control options right on the top of the switcher is a menu control so you don't have to download any type of software to get to some of the more intricate parts of your video switcher and make those adjustments you can simply go into your menu clicking it down and then scrolling with the turn wheel and you can notice that there are a bunch of different settings that you can change inside of the switcher you can even add some pictures inside of here as well to bring those on screen you can change the brightness to program outs you can change a whole bunch of different settings inside of here all with the click of a button just pressing down on the menu option and then scrolling down so make sure that you check out all the different things that you can edit and change inside of the switcher just by a click of a button using the menu option now that you have an idea of how to use a video switcher and the importance of it in the next video i'm going to walk you through some of the basics of a ptz camera and why those are super cool to use and i get a lot of attention when i bring those into my live stream productions i'll see you in the next video [Music]
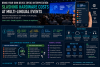
6. These New Video Switchers are a GAME CHANGER for Churches
exciting news in the world of video switchers black magic design has made some pretty significant updates here to their line of atem switchers so let's just walk through they get this product page here that kind of explores the the whole line of all the switchers i think a lot of these switches are great for different churches different size different uh needs that a church may have have in their video switching system uh for their live stream um so let's start at the top of the list here we obviously have the a10 mini the mini pro the mini pro iso the next stream and the xtreme iso and then this is the new one yet actually we even have the little signs right here it says it's new the atem 1me constellation hd atem2me constellation hd and atem4me constellation hd these ones are probably the ones i'm the most excited about specifically for a small to mid-sized church environment that wants to kind of up their game with a video switching system because we have made the recommendation a lot for folks to check out the a10 mini or mini pro when you're using software like pro presenter to stream for your service and you want to get some camera angles in the pro presenter to send online in my personal opinion i've never been too pumped about the a10 mini xtreme and mini xtreme iso um i don't know maybe i'm wrong about that i don't know what your opinion is there adam but to me i'm like i'd rather have well what we used to use was the television studio hd which now this is this is kind of the updated version of that and it has all the things that we would want uh that's pretty much within an a10 mini extreme like the usb feature for a webcam feature just some of these nice conveniences they finally put that tech in this rack mountable compact switcher device so i'm pretty pumped about this i feel like the the kind of like sweet spot of video switching capability would be getting one of these it gets you up to 10 inputs which is plenty for most churches need about four or five cameras maybe have another two to four available inputs for your pro presenter machine for lyrics and and backgrounds and all that stuff or videos you know this this switcher with combined with like a stream deck to actually be your physical controller on your workstation i think it's a pretty great setup so what are your thoughts yeah the first thing i noticed about this was well two of the first things was like the usb output like that's new to this size you know and then all sdi like there's no hdmi the television studio hd had four hdmi inputs on it and if you're in a complete sdi you know setup then you know you have to convert them back to sd or back to hdmi from sdi to plug it in so if you're running all of your cameras over sdi you don't have to worry about extra converters same thing with the multi-view there's only sdi multi-view there's no hdmi on any of this which i prefer because then you you have more flexibility you can run it longer you kind of in the same ecosystem i agree i think it really reduced the amount of of converters we'll have to use maybe in some ways i don't know it depends on how you look at it it might have increased it in some cases but for the most part i think it reduced it because a lot of your cameras are coming from longer distances already i think these especially this switcher if you paired it with the the new studio uh 4k cameras that they have that do have dedicated sdi outputs and then it's like man you're you're just running all the sci runs so that's just very convenient it's really annoying to have to deal with all these different converters and such yeah so looking at the back of this device here you've got the usbc port now which is great because um not that personally i would have to use this in this way that often we use boxcast or you can use resi as your encoder i still would recommend doing that but for some people maybe you just want to you know send your feed into something like wirecast or obs even though i'm not a huge i'm not a huge fan of those software encoders out there because they're just the quality is not great but you could or you know any application even on uh zoom or something right like you could you could produce the majority of your service going into your switcher here cameras and displays and lyrics and then you could plug the switcher into the computer running zoom a lot of churches like hey how do i get a good stream on zoom like well this this makes it you know pretty a pretty convenient way to do it without having to buy an additional um video capture device so basically they've integrated that video to capture device inside the switcher and then yeah like you said it's all sdi nice and clean here you've got the control port for your network so you can control this switcher from the atem control software you can get a stream deck like i said if you want a nice desktop mountable control surface we really like that setup and then you've got your audio inputs on the right here i wish this was xlr i wish i wish they would yeah that's the one thing if i could change something that was different on this it's like uh why couldn't they just put some you know balanced xlr inputs here but it's not the end of the world i do think they are balanced i think that they're just balanced quarter inch so i just gotta get the right tables um but you know it does save on space within the actual like when they're able to put the device together like there's not really room for xlrs unless they removed something else yep yep so the other thing i think worth talking about is the different levels of how many mix effects you get so with the this entry level one which to me is just the new better version of the television studio hd you get one emmy or one mix effects then here you can get a 2me and i actually think the price is is pretty reasonable i don't i think what's this one 1500 bucks you might have to pull up those prices on b h to confirm for me yeah i think it's maybe 1600 yeah yeah so still less than less than um 10 grand but you're getting two emmys and and for folks who are trying to understand well what's what's the point of a whole at me well basically you're gonna have like two different program output capabilities from this switcher and here's here's a use case i get excited about this is now we actually should probably look into just doing this at south where you could just have all your cameras and all of your video sources like computers pro presenter all that stuff going into your video switcher and then you have one mix effect uh dedicated to your live stream like what people see online and then you have another mix effect uh dedicated to your in in the room projection screens um so you could have two different things going there most of the time you're gonna pro presenter going to those screens in the room um but then you know sometimes you might want to have that ability to throw a camera up for for eye magnification or something like that to throw a camera on the big screen so that's that's pretty cool and this almost i don't know if it completely eliminates the need for like a video hub or the convenience of having a smart video hub i i still think those are still pretty relevant but um just the fact that i mean i guess almost would eliminate it if you can map i probably need to dig some into this a little bit more but if you can map like any of these inputs to any of these outputs you know you could really maybe not even have to have an extra video hub in your setting di because you can independently route any sdi and put to any or any internal source to each output so you can you can run you could run your confidence monitor in and then out of this and use it as a video hub well there you go that answers our question we were talking about earlier it's like you really do have that flexibility so man now it's very tempting to be like man for you for you could get the the atem the the 2me constellation here the second one and i feel like you have how many inputs and outputs you have with that one you've got 20 inputs 12 outputs yeah i mean i think i think that's going to be the one size fits all solution for most church settings because you're right it's like every all the it's like the ultimate video hub and switcher in one that's exciting yeah so just just to re rehash that to make sure people understand like any unique video signal going into these inputs can then be routed to any of these outputs and then i'm guessing in the settings somewhere you you can then also select like your your program um your your two two emmys uh as well so to go with that or how long it's output yeah and yeah and multiviews sweet there's so many times when people ask me how do i how do i have you know our imag on the screens and switch for that as well as how do i at the same time switch for our online and so yeah before there weren't any great solutions and now there is so this is pretty exciting yep yeah and all the all at a really affordable price point so that's what blackmagic is known for of trying to like you know how much quality can he maintain by keeping that price low and yeah sometimes there are some issues with quality control you gotta get ship your switch your broken switcher back to blackmagic to get serviced or whatever but they're also pretty good at that process as well so i'm i'm really excited about this new line of switchers if anybody is looking to upgrade from an a10 mini this looks like a great next step in my opinion especially if you kind of go about the same processes we recommend in our advanced live streaming course which is the system that again it's a bit more robust you're gonna have maybe three to five to six camera angles um you know so quite a bit of camera feeds coming in you're gonna be sending out your display feeds from your pro presenter workstation over a deck link duo and and then you want to also send a dedicated program feed to like an encoder whether it's boxcast or resi i think this is definitely going to be the best option for a video switcher in that context for sure yeah another exciting thing on this one is um like each input featuring its only its own dedicated up and cross converter so if you want to have your computer you know like a not pro presenter but like a google chrome or a keynote or whatever output going to your main screens if you want to send that out at 60 frames a second or you know 30 frames a second but you want cameras to be 24 or you want some cameras 24 some at 30 i mean you know that's possible now and you don't have to worry about keeping everything exactly the same frame rate yeah that's awesome and the the uh man because that's such a pain when you're like you know one of your devices like sometimes a device won't even do the exact frame rate and then it just completely won't work with the atem switcher or you have to like switch the you have to find like what's the common framework rate that's compatible with all these cameras and these monitors from multiviews yeah all that stuff and that was such a pain so that's oh man that's a really important pain point that they solved there there's so much more this video switcher can do that goes even beyond what i think most churches will ever use it for like the dve effects like you know you're doing picture and picture and the fancy fancy stuff for like news production it's great to know that you have it um but but again man i just think the value you're getting you used to almost have to pay this much just for like a video hub um but now you're getting all that that capability in one so guys just make sure you check out the worship ministry toolkit adam and i will be updating this with our latest recommendation for video gear for live streaming which is definitely going to include these new switchers from black magic but we have a ton of other great recommendations there as well so link down below check out the toolkit
7. The New Roland V-8HD Video Switcher/Mixer
the new V dash 8 HD HD video switcher from roland under $2000 1995 a really great product it's 8 input so you know we've been selling the v1 HDS for a while the 4 inputs mixers we'll get into that a little later there's one on the table but this is an 8 input mixer and it's also got three built in scalars now before we talk about the scales can we cut to this shot I want to show people the inputs so we've got the 8 HD inputs we've got output on the menu we've got audio jacks as well we've got special effects and other features that we're getting into the whole thing this unit folks is a mock up unit it's powered and lights up and it's not working yet we're expecting our first units in next week but I want to talk now about the roland scalars if you're a church or you're doing educational video you know when you go to put a PowerPoint or Excel or some other graphic maybe it's a website with words Wikipedia or something are the lyrics to a to a to a psalm they sometimes don't look good they don't scale right they're blurry they're not clean they're washed out the rolling scaler is second to none it is good enough and it is the same technology that's being being used for I mag in concert venues across the world it's that good of a scaler and there's three of them so that means you can bring in three computers or other devices that can be scaled up to full HD resolution with a gorgeous gorgeous looking video and that's real important all kinds of layers of effects that you could set up so let's bring this graphic up full screen because you've actually got an example of five layers of effects they've got video they've got to picture in pictures and they've got a downstream key or bringing in some graphics that you could say this is a very powerful tool and these can be set up together as like a single switch or you can bring them up independently on the mixer so really great that you can put those such an expensive product easy to use can still give you all that layering and effects that you need you're gonna get seamless memory recall which means you can play back video that's stored in the device eight preset memories you get separate feeds so you could have confidence monitors live stream recording feeds you get a separate output you can do an output that can go into a streaming device we're gonna talk about that a little later you can also have an output for ima you could be running your screens in your church in your house of worship in your boardroom for government or in your educational setting built-in multi viewer display right here on the face again if we can go to the top shot this display right here could actually be a multi viewer so you can see your different inputs very cool you could also see your screens and menus to get into it I like that a lot you also going to get audio effects for a clear sound mixing 8:18 audio channels from the 8 HDMI inputs plus stereo RCA and a large effects library like I said you can do clapping and other types of effects that you can bring in it's got some automated video switching that can follow the beat or mix every X amount of seconds or what have you that really makes a program especially like if you're in a bar or something trying to do an event very cool little features that they have there the other thing that this has much like all of the higher end role in mixers now how does they have their own iPad app which allows you to use an iPad that gives you the full set of controls of the device plus additional features you can come in and they have hands-free controls we're gonna talk about those hands-free controls a little bit later we talked about the vo2 but those basically allow you to do a single button cut a B or a dual button which could be you know bring up an effect like a picture picture or cut a B so that's for hands-free control for that person who's like the video blog or someone who's trying to do a one-man show and run the whole show I mean I'm lucky I got a production crew over here is producing and mixing my show but sometimes you might be in a situation where you are the production crew and this is a way to go now this product is you could say if we ignore the overhead shot again is small and portable very rugged built very solid but it's portable it could fit in a backpack why is that cool because you could actually do some cool stuff with it one of the features that they just did is they just signed the deal with atomos shared technology this is the animal Shogun 7 their new seven-inch field monitor and recorder well the cool thing is is you can set this up so that the role in mixer you can hit a button and it can start recording your show so you can record your program in Full HD resolution directly from the output of your role and mixer which is really cool because you might want to go back later and do some editing loaded up to YouTube Facebook what have you or you know what you may decide that you want to stream your show so if you want to stream your show what I'm gonna give a plug to my my favorite product the live you solo with the connect modems on it this is a complete streaming solution you bring your bandwidth with you whether you have reliable Wi-Fi reliable bandwidth of the vendor the place that you're going on location doesn't matter from the middle of a ball field this uses cellular bonded technology and it guarantees you a reliable HD stream up to the cloud that the two cellular modems can combined in the cloud then that bigger combined signal gets passed down from the cloud to Facebook or YouTube or wherever you want so you have completely this gives you reliable dependable assurance that you're always going to have high quality bandwidth with you and insurance that you don't have to worry about your stream going down so live you solo connect the great product that goes with any of the mixers we're showing on this show and these are available from us and we can get create bundles with you as well
8. Roland V-1HD Video Switcher: In Depth
hey everybody this is Jason at the dve store I'm here today with the roland v1 HD high-definition video switcher it's a compact little unit has 4 HDMI inputs it looks deceptively simple but this thing has quite a bit of power and control built into it we've got some menus we're going to delve into we're going to go through them and I won't go into excruciating detail on every possible function but you'll get a really good idea of of what this thing can do and if it's going to work for you I can see working really great for high school sports for you know live bands theater houses of worship services this could be really a great little unit for for those types of scenarios I'm going to show you what I've got plugged in and how I've done it and how I'm recording this and just kind of the whole layout and also some other options I've got some some nice little gizmos over here we'll talk about it's a real life review and it's a hands-on here so so bear with me and then I think you're going to you're going to learn some good things if there's something is if there's a question that don't answer then by all means please put it in the comments I'm going to keep an eye on those and do it a can to to help you answer any questions so I've got my 4 inputs number the input one is my overhead camera I've got a Panasonic gh4 just overhead here to get a downward shot of kind of the whole table here and what I've got and then I've got my little pc netbook here which has an HDMI output port that's coming into input too we can switch to that so I can show you that really quickly input 3 is actually my iPod so I have a little lightning to HDMI adapter that's running into input 3 and then input 4 is my MacBook Pro and I just have a QuickTime Player looping a video of Megan her music video is actually no no audio to this at all but four sources running in so here we are now as far as output I've got the program out going into this at a most Ninja Assassin so it's recording everything that I'm switching everything that I'm outputting is showing up on the screen here so and being recorded in high definition now this is a little overkill because this does 4k now but the rollin w1 HD is purely an HD switcher does not do 4k just want to make that clear the nice thing about the ninja line is that they do a pass-through so you can take your HDMI output as you're recording your switch program the live output you can send to a streaming encoding streaming device such as the Teradek vide you with a live stream a broadcast a pro these boxes are basically identical the difference being that the live stream only works with that service the tarot deck will work with a live stream you stream or YouTube so there's a little few more options with that as far as inputting again this only takes in HDMI if I switch to a input 3 you can see the back side of the panel here we've got two outputs output in preview our four HDMI inputs there now so if you've got HDMI cameras you can plug these right in although you can run into an issue if the cameras need to be far away you might not be able to run the HDMI cable that far without degrading the signal seriously so there are some options and I've got a couple of them here and that is converting the HDMI to SDI because SDI you can go a good couple hundred feet without an issue so here's a couple different converters one by Blackmagic Design another by aja that will convert from HDMI to SDI to give you that distance you got to convert back once you get to a switcher because again this only takes in HDMI so you need something like this which is the little Atmos box which will go SDI to HDMI and at that point you'd go into your switcher another option for long runs from a camera or another HDMI video source is the roland h TTX 0 1 and h TR XO on the first is the transmitter that converts the HDMI signal for transmission over Ethernet cable and the receiver converts it back to HDMI the benefit is that the necessary cat 5e or better Ethernet cable is less expensive than an equivalent length SDI cable and the converters themselves are a bit more affordable than the HDMI SDI converters so on a 200-foot cable run it looks like you could save a couple hundred bucks I'll put links for all these devices in the description if you'd like to explore them further and while we're talking about converters and and switchers want to mention this decimator design mdh X this is like the Swiss Army knife of you know cross converters and the little Das it's it's got HDMI input and you can then take that and it converts it and out outputs SDI and you can do multiple outputs so if you have multiple sources that you need to feed via SDI you can do that here like a little distribution hamp you can also input SDI and output HDMI so it converts in the other direction as well and there's just a lot of functionality here in the menus it's just a powerful little little box again just kind of like a little Swiss Army knife if you're doing this kind of thing it's very handy to have let's get back to our back panel here again and this is coming from my iPad excuse me my iPod and I'm just using my finger to just scroll around on this images like it's like live Ken Burns pan and zoom it's it's not very smooth but it's kind of fun to be able to interact with the image in this way and see it up on the on the preview monitor so we've also got two audio outs and audio ends analog RCA as you can see there let's scoot over to the other end here three format options 1080p 1080i at 720p I've got my mixer here set to 1080p our power input comes with a wall wart we've got a USB port and there's some software that comes with the mixer I'll just jump out and show you a screenshot of that software here it is so you got a lot of control here all the same controls that are on the the physical device as well as more that are all right there at the click of a button there might be cases where you prefer this to the actual physical control panel so you've got those options I for one really like this this control panel it's nicely made it's got a nice brushed aluminum faceplate I'm not sure what material the bottom is I don't don't think it's metal but it's very thick dense material the whole thing has some nice weight to it the buttons are are kind of rubbery feeling the other translucent because you can see these lights through them but just the whole thing has a really nice feel to it so it's it's fun to get your your hands on this so let's go ahead and jump into the audio menu to start off with and we've got a little audio button here so we just push that once and bam there we are the menu shows up on the preview monitor which is nice because you can change things in the menu while you're outputting from your program and not have to worry about the menu showing up on that as you can see we have a which you can just set our levels for each HDMI input for audio so HDMI audio a one that's my camera overhead I don't want audio coming through there so I just I just pulled that down to zero my other sources actually don't have audio coming in so I didn't bother changing those and you'll see that the audio follow a setting is set to OFF which means that any any audio input that I have into the mixer is going to be all the time so and in this case all I have going in is the like so that works great because I don't I don't want the audio to change as I switch my sources so that's how I have it set now our master out level and again we can just control this with the the T fader here probably don't need over a hundred let's crank it back down mic level again that'll have the same effects since that's the only audio source that were we're dealing with right now and so lots of lots of control here just wait till you see the rest of this so we've got all kinds of frequency adjustments that we can make for audio for HDMI input one we're going to cruise through those input two input three input four I'm just holding the transform button down to move through these really quickly oh and there's delay on each of these inputs as well so depending on what you're outputting to your your audio and video might be taking separate paths and so they may not be matching up what you can delay your audio to match those two sources up that's something that's just really essential to have all the same controls for your audio inputs on the back panel there I showed you the RCA inputs and these are all controls for the microphone input which is what you're hearing right now I'm actually recording this through the mixer and into the atomos Ninja Assassin so if we crank down the high frequencies you can see that they're now not in my voice any longer we can crank them up and what we can really hear that sibilance I won't speak any Parseltongue because that would just be painful right now so we'll crank it back down to zero how about okay so again a full control over all the frequencies and again our delay function compressor it only affects anything above the level that you set here so anything above negative 12 will be affected by the compressor compression ratio we can we can tweak that go through all these different options you can see attack and release there's a microphone gate so you can you can hear the difference when I turn this on you can see that when I'm not talking it gets totally quiet because it's cutting out all the background noise anything under negative 36 dB go ahead and turn that off but we've got the threshold there we can adjust and the the gate release in milliseconds we get the mic high-pass filter to filter out any troubling rumbling low frequencies we may need to do get rid of and again just all these controls for the main output and we've got reverb we can crank up the level although we don't have a lot of reverb time right now so it sounds really close but if I crank it up to 5 suddenly it sounds like I'm in an isolation chamber I can't I don't know what it is about reverb I could just I could play with that forever pretty much a lot of mastering options for the overall sound that's coming out again we can set this the audio to follow the just the audio input if that's what we want so it's going to it's going to stay on the audio end no matter what we switch to but that's not what we want right now audio follow mic didn't need to do that this time either just because the only audio source I had was the camera I just turned it down so a lot of control we're going to get out of the audio menu we're going to go into how the set up menu so we're going to press the setup button hold it for two seconds and boom here we are on the setup menu page one beats per minute we can adjust this depending on how fast we want that to go and you can set the video to actually switch to the beats per minute automatically which could be cool in some situations this is a good thing to talk about the HDCP so it's like the copyright protection they put it on blu-ray movies well if you turn that on you can actually feed for instance a blu-ray movie into it the mixer as a source and then feed it out as long as you have a device on the other end which is HD CP compatible so you've got to have that compatibility all the way through and this this option lets you turn it on for the v1 HD output contrast let me just show you how this looks on the output turn down the con contrast and then turn up the contrast let's turn this back down to zero and keep going colorspace options depending on what device you're outputting to may want to change those auto works mostly just kind of plug-and-play how you can change the settings on your preview output as well to your liking picture-in-picture options border size and color you can change Auto scan for switching your your inputs automatically a B mode this is just a mode that affects the panel here and how it how it functions so in program preset mode your program so whatever is live is going to always be on the a bus on top here and whatever your your preset is whatever you're going to switch to next whichever input is always going to be on the B bus but then as soon as you switch it's still your live is going to be indicated on top and your preset is going to be indicated on the bottom so it just it sets it up so it just stays that way now if you switch it to a B mode it's going to switch back and forth so when you transition your live video is going to show up on the B video bus and your preset will then be on the a bus so just depends on how you want to use it how you want to view it hopefully that makes sense to you I kind of like having it my live video always show up on the top and we appreciate always on the bottom is for me it makes a little easier to track it freeze mode some other signal stuff here D interlaced mode we've got bob and weave color bar output boom there we go for testing purposes test tone output we can do as well pretty nice here's all the MIDI stuff for you MIDI geeks know those people out there that are excited by that you can set presets you can store up to 8 presets so 8 setups menu setups for the mixer and then you can tell it which one of those saved presets 1 through 8 that you want to load when you power on the mixer so it's pretty cool the LEDs actually you can change the colors so if you take a look at that pretty cool you can decide if you want the input LEDs on or off if it's set on then anytime you have an active input then that number is going to be lit up in white transformer LEDs on or off so a lot of control here your audio LED here you can you can tell it what you want it to indicate so it's telling me now that I have a master output level that there's something coming out if I switch that to mic it still shows up because that's the audio that I'm inputting if I go to audio in suddenly there's no indication of a signal because I don't have anything going in to the audio input effects type change so that allows you to change your effects by using the knobs on the board here without going into the menu same with your transitions frame rates to available 59.94 and 50 factory reset and your firmware version and that is a run-through of the setup menu the only menu we've got left we haven't looked at is the memory menu so we've got two effects buses one on on the a video bus one on the B video bus I'll just refine let's do a white luma key on the effects a bus will go to our input four and then input to our web background will be the background for this effect so if we turn that on keys out the white because we've done we've done a luma key and so there she is in front of the website she looks she looks good on our website that's just one of the many effects that you can do again as soon as I hit a effect goes away so here we go we're wiping back and forth and look at this we just happen to be seeing the dve store page where we have the roland v1 HD coming up for sale expected release date December 18th that's the day that Star Wars is coming out of worse look wipe Star Wars you got it nice but that's not all that is not all as you recall the planet Alderaan was destroyed by the Death Star and the Death Star that deadly blast was operated not by a wipe but by a t-bar fader just like this one there's a lot of power in that little bar so if you're having any additional questions that I didn't answer here I'm sure there are many I'll do what I can to answer those for you go ahead and post them in the comments below it'd be great if you would like this video and subscribe to our channel we're going to have a lot of other content on brand new products that are coming out and then I do our best to really help people understand how to use them and that's the great thing about the DVD store is we're really into customer service we want to help you make better video you
9. AVMatrix PVS0615 All in one Portable Video Switcher / Recorder Tutorial
hey everyone this is Michelle with evolution productions in pro video go calm today we are looking at the AV matrix PV 0 6 1 5 portable all-in-one switcher the slow guy is a little bit bigger than a laptop check it out for you right here and now ok before we get started I just wanted to show you the backs and sides the AV matrix switcher so here is we're looking at the right side card slot for your SD card I have a 64 in there right now the landline is for pretty much software updates and setting your time clock at this point then you have a headphone out jack power supply in which is kind of nice it has the twist on come on undone or dislodged you have left him right in and out TRS sleeve quarter jacks you have two HDMI outputs you have three SDI program outs and the third output can be set to to take your preview screen and output that as an ox so you can actually output to different sources if you if you do it properly otherwise you don't set it up that they will take your program out you know for SDI in slats and then inputs five and six have multiple different inputs you could choose from so you can have HDMI in you can have DVI in or if you go around to this side you could do USP USB player in what that gets you is the ability to store an image files so logos store maybe a lower thirds you could also store a movie file on that so you could play a movie right from your USB stick so you can choose again it puts five and six you have three options to choose from and then you have your multiviewer out which you also have a multi you are already in the unit so that that would be an X term excuse me extra multi-view are out and then a tally for your cameras if you choose to use it let's take a look at the screen clear off the key here so you can see it better and then let's just go over it so here we go this is a preview program we have one two three four SDI inputs and we have two HDMI inputs that are changeable they can be either HDMI DVI they can be USB see you have the option to change these depending on what your needs are right now I have HDMI camera here on the keyboard and I have I have a graphic in the USB stick that's on the side so there are two slots for USB sticks that you can load you can either load graphics or you could load video and switch between the two so that is pretty cool great graphics store then we have a little little clock and a little status window here that tells you what is going on so let me get a little closer in on the clock and status button here window here and here you can see that what you're looking at channel 1 channel 2 3 your phone this is our audio mixing so I have the option of taking channel 1 as you see actually look at channel 2 right now its input 6 and I'm changing it here to TRS that's that's another way we can get audio in if you have an external audio border some kind of external audio we bring it in TRS and so you can change this to any input any of those three can change to any inputs so it's it's a very nice and I will let's take a look at the closer look at that real quick here there we go so here are your imputs and then this is how you change the source and your master and then if you wanted to pre listen to that that's how that works so it's it's really pretty cool whoops and go back to the full screen here with our PTZ off like optics camera for a robotic camera here let's go on and take a look at the keyboard and this is part of the keyboard right now we are recording right to the right to the recorder with it excuse me with an SD card in the side it takes 64 mega bit card class 10 it records it'll follow your output of your switcher which is it's going to be either 1080i or 1080p and all the various frame rates so it will follow that but you are you there is an option to change sure megabits per second how how it records in what quality so there are four settings for that and the highest is 25 megabits per second the lowest is 6 so it's pretty nice that you have those options you can pause this record if you wanted to so you if something was going on it won't break up the file it will just keep recording then you can really hit that and it'll just follow right along here this has all the transitions you you you like your your typical transitions here you know let's just go ahead and take though there's a cut let's get into it wipe we have typical transitions here go back there we go yeah very very simple that I mean it's very easy to use these are these two little buttons here this is how you pick your input for those two five and six inputs that I was talking about so let's let's take a look at this a little bit better like this okay now you can see my mistakes so right now six I can change this input so I have six highlighted and I just hit the button there once and you can see went to DVI VGA I don't have these in but you could if you had them you couldn't use them all once of course and then back to the USB and then then you can change that image and I think have four of them stored here really good for a logo store yep there we go and then you can also change it to video so I'm going to take take it here and bring up the video I have saved and let me just bring it there there it is that is the actual video that I took from twitch there just to borrow for this purpose and and then we can take that back and now we're back into yeah back into our graphic store which is fantastic all right let's go on down to the t-bar here we go and get my head out of the way so we have a full t-bar there that I love that there's just nothing like it you have feet of black this button here is a to function buttons that you can program right now I have as you see that just froze f2 i don't have set up yet so those are two programmable buttons we have picture-in-picture option here we have picture outside a picture option which is really nice for those let's say you have a presenter and they have a PowerPoint there you go gonna both write it at the same time it's fantastic we have luma key which there we go and chroma key which is it setup yes so you got those we got those um let's go back to the main screen okay and actually let's look at all the keys here at once you can just kind of see them get my head all the way this also has all this written up here so people if they don't know what they're doing it's kind of got instructions just kind of written right into it here so what you're looking at here is is the bad news status menu and this is what it will show in normal operation mode we already went through the audio channels and how that works I'd like to show you we're gonna do a little side by side action here so you can see here's the button that I'm pushing to get to this menu so right now if that's the way it sets for it since I hit the peop button this new menu came up so let's just run through that real quick here's the window that you're working on window one or window two so we get that we can go down to the position click once and move the window to you can see it's move in there so it can go side by side I'm sorry I'm live sideways it can move up and down border and able on or you could turn it off border width goes from two to seven there's seven there's two different color borders white red white and then if you were to do the same whoops oh this way number one it'd be the same you can change all the positioning on that one as well so now we're gonna clear I'm gonna clear that and we're going to go into the p IP menu and bring that in and so this is all the same you can change the position of it right i guess we'll move it out of the way vertically so you can see what you're doing here it's a twisty of a knob to move it there's three different sizes here so there's the small there's the medium and there's the large size i don't know the exact dimensions of that but those are your options small medium large again with the border enable the board of wit those are the same as the other well as it that the other options here is luma key I just hit the luma key and I don't really have anything set up for that so I can let me show you but you can't see that you can change the level and on the chroma key you can change this to blue if you like so it is customizable in that area well exit that we're gonna go back to this one for a second so I can show you there's two function buttons here and wanted to get into it because you're in the status menu and you're gonna push once on the little button then you go into system settings this will give you the chance to change your language you can take your clock from analog to digital and let me see if I have this in here I can show you there we go so if I take that now to digital that's what that looks like I prefer it here okay so the two function buttons that I was showing you have options you can choose so let's look at this I should have it on freeze which will freeze program and audio so when you push that if you have something going on you need to change something you don't want anything to change on screen you can you can hold it with the freeze that's on the program not on the preview so if you turn it off that's what that happens you can turn it to have that button act as a P IP or act as a PL p mullah or chroma to me that doesn't make a lot of sense because those buttons are already there so I think they have more things coming in the future upgrade same thing with f2 audio Oh in the if you have a little delay can mess with that and if you want your date on or off on the middle on the menu you can just turn that off that be on the clock menu and that is that you turn there now go to network settings you can set this for dynamic or you can put in your own IP address however you like to do that record settings there is four different settings here so we can go here the low setting is 6 megabits per second medium is 12 megabits per second high is 18 and ultra high is 25 megabits per second record rate so the only thing on this is that the the files are cut up into two via bytes sections so the higher you record quality the more often that's gonna splice those files up which will just make it no harder in the post just not put them back together again but other than that it records really nicely I just use this on a show and in the quality was pretty amazing and I recorded on the medium rate and and so it really does record nicely there so let's just go return and then device info I just told you your serial number okay now let's go over the USB media player so then this is played off of the USB stick which is in either five or six input and let's just refresh that here's number five here's number six in order to activate either one of those you toggle through using this button here five or six so right now I have my camera on six so we'll leave that one alone but if I wanted to use five let's say it wasn't on it was on DVI so I would just push the button and I'll get through VGA if you have an adapter HDMI no USB that's what we want okay so that's the first image on my USB stick so in order to now utilize this I have to make sure and enable it first so it's in USB five so I have to enable that and when I push that button now it activates this player and all these buttons here so that's activated let's go back I'm going to go to the next image by pushing this button and the next and the next and then and that's it none he'll go back to the beginning this also goes backwards so if I wanted to though well that's that's how you access your pictures now if I wanted to access the video I have one video on here as well I have to make sure that this is enabled which it is and then I hit the video button and it brings up the video and it automatically starts playing so if I want if I want to I can I can pause it I can fast-forward it that's right unpause it fast-forward it and it fast forwards um what was the number 32 times if you wanted to fast-forward 32 times the speed you could do that go backwards you go to the end you could go to the beginning so what I would do is let's say we're back here on on our image and we have video to roll I would probably as soon as I hit the video button as soon as I see it load I'd hit the pause and then you could take it to program when you're ready and not have to worry about it loading okay I do want to show you real quick let's go back to the images I'm going to fast forward to this one which will there you go this will tell you what formatting is supported so I've only tried mp4 for movies I have tried jpg and PNG for image files and I do believe that the PNG loads a little more slowly so I would suggest the jpg image I did not try the bitmap image on this and I think that is all for this part I mean we really really like this little device we're digging it and we happen to have it available on our website at Pro video go this retails for $26.99 our plan is to use it with one of our hardware encoders so we can stream to the web without use of a PC or a Mac and we can just stream it right out there just this machine you show up doesn't matter what they throw at you anyway we really like this and thanks for checking it out with us let me know if you have any questions whoa whoa and I will answer them for you hey that you order from us you also get this handy carrying case from a be met matrix check this out it's got the laser-cut foam it's a really nice case not too heavy but durable and it will protect and also comes with a tally connector all right Cheers bye-bye