Video Gallery
Table of Contents
ToggleThe Video Gallery of Audio Mixer Desk is appended below:
1. How Audio Mixers Work – What is a Mixer & What Does it Do? | Live Sound Lesson
hi I'm Mitch Gallagher from Sweetwater you know some of the most common questions I receive are about mixers what a mixer is what it does what all those controls do in the front panel and it can be intimidating when you step up to a mixer for the first time there are all those controls laid out you don't know what each one does and you don't want to mess anything ZUP when you're mixing live sound or you're working in the studio [Music] so in this video we'll be introducing mixers to you I'll be talking about the controls the channel strip how the signal flows through everything that goes in to using a mixer to create a great sounding mix whether you're on stage or you're in the studio now the first thing to keep in mind when you're checking out a mixer for the first time is that although it looks intimidating with all those controls there's actually a lot of repetition there so we have a channel strip the signal comes in the top flows down through all these controls down to the fader at the bottom and then it's routed over here to the master section and back out to speakers or a recorder or wherever it may be going but each of the channel strips after that actually duplicates those same controls so once we learn one channel strip we've basically learned the entire mixer let's start at the top and look at how signal comes into a mixer like this one other thing to keep in mind is that we have analog mixers we have digital mixers and they really do the same thing it's just where the controls are located that may be different on an analog console like this Mackie Pro effects 12 V 3 all the controls are right here on the front panel and instantly accessible in a digital console some of those controls may be in menus you may have a single channel strip that is assigned to the different channels and so on but all the functionality all the concepts are exactly the same let's talk first about getting signal into the mixer at the top of each channel strip we have a jack for connecting our sources and on the first two jacks here we have combi jacks these accept both XLR as well as quarter-inch cables so you could connect a microphone a line level source like a keyboard or a music player or even a guitar into those channels on channels 3 through 10 we have separate XLR connections for our microphones as well as a separate connection for our line level inputs the input Jack works in conjunction with the gain control which is sometimes called a trim control to set the incoming level for that signal so let's check this out with three different sources with a microphone like the shure sm58 typically you'll have an XLR or a 3 pin jack and that plugs right in at the top here now once we have that signal coming in we can adjust our gain until we see the indicator light not all mixers will have that indicator light some of them will just have an overload light that look low red if you're putting in too hot of a signal but there'll usually be some way to indicate that you've got signal coming in to the channel now at this point there's no sound coming through the mixer yet the sound is coming into the top of the channel strip but it hasn't been routed anywhere to get sound out of the mixer we need to bring up the fader which is the volume control at the bottom then we'll also hit the left right switch in this case you may or may not have to do that depending on your mixer but in this case to the left right switch assigns us to the main output over here now we can see our meters are moving and you can hear the sound coming through the mixer we could also bring a line level source in using those same connections or using the line level connections here on the different channels so I'll plug in 2 channels 3 & 4 the signals coming from my computer and it's playing a drum loop now we set our levels in the same way we bring up our game control but again to hear the signal we're gonna need to push up our channel faders hit our left/right buttons and move up the main output now we can adjust things so we're getting a good strong signal on our meters typically what you want to do is set the gain control so that your faders are up to where you have plenty of room to move them both up and down this allows you to create an effective mix later and of course you're gonna adjust that gain control later if you're overloading you don't have enough signal you can always reach up and tweak that now this is a stereo source so we'll want to pan this left and right so we can hear the different elements across the stereo field to do that we simply adjust the pan controls on each channel move one to the right and one to the left our final input type would be instrument level which would typically be an electric guitar an electric bass or maybe an acoustic guitar to connect this on the Mackie we go back to our first channel which has a high z input now that high Z input is very important because the pickups want to see high Z in order to sound their best so in this case we plug into the quarter inch connection hit the high Z switch bring up our fader assigned to the left-right adjust our gain control to explore the rest of the town strip let's go back to our drum loop so I've got a plan for my computer here we've got our gain adjusted we'll bring that up so you can hear that it's feeding through our main outputs now we can mute this so we don't have to listen to it by simply hitting the mute switches we have other functions in this mixer as well for example in the Mackie we also have a compressor on board the first four channel strips the compressor compresses the dynamic range of the signal so the difference between the softest signal and the loudest signal is reduced this allows things to be much more even as they go through the mixer so we can turn that up here not every mixer is going to have a compressor in some cases you can insert that as an external piece of hardware and that's where this insert Jack comes in we plug in a Y cable one side of the Y cable plugs into the input of the compressor the other side of the Y cable plugs into the output of the compressor and brings a signal back in so it's a way to insert an external piece of hardware into our signal flow again you don't have to do that but it's something you may want to do if you have specific processing you want to apply to a signal below the insert Jack we have a low-cut filter in this case that's at a hundred Hertz this allows us to take out Rumble and unnecessary low frequencies in the signal that could reduce our Headroom so with our drum loop if we engage that we're simply cutting the bottom end now with the low cut filter you want to be careful that you aren't taking out signal that you actually want to hear so for example in this case it's taking out a lot of our kick drum you may not want that so we may not want to engage the low cut in this case but with a vocal there may not be anything below 100 Hertz we could certainly filter all of that out and clean our signal up even more the next section of our mixer is the EQ section and this is where we adjust the tone of our signals so if we've got our drum loop coming in we have three different controls for adjusting that we have high frequency at 12 kilohertz and this is our treble control we have a mid band at 2.5 kilohertz this is our mid-range control and a low frequency at 80 Hertz and this is our base control on some mixers you may be able to change those frequencies that gives you more flexibility for adjusting the sound but just having these controls allows you to really shape things to make them sound the way you want them to sound as well as to control feedback and other issues let's listen to the high frequency the mid frequency and the low frequency bands [Music] [Music] [Music] an important concept of mixing consoles is buses a bus is a signal path that allows you to route an incoming signal to another destination so for example we have our master bus when we engage left and right down here with this switch and feed the main output we're feeding the master bus in that case we're creating a mix by moving these faders and that's then sent out of that single output we may also have the option to route to auxilary buses in the case of this Mackie we have two auxilary buses one is labeled monitor and it's green the other is labeled effects and it's yellow so what happens is as we turn up the knobs for example on the monitor bus the signal is picked up from the channel strip we create a separate mix basically using those knobs it's sent here to the master and now that signal is routed out of the monitor send Jack a monitor sound like this might be routed to monitors onstage for musicians to hear as they're playing or you might send it to a headphone amplifier for musicians who are performing in the studio our second bus in this case is effects in the case of this Mackie there's a built-in effects processor so we can feed that using this bus we also have an external effect send if you want to use an external Hardware processor so when we bring up the effects send bring up our fader we're still assigned to left and right we can also bring up our effects send we'll hear a reverb from the internal processor being added to the master output [Music] now the effects sent is what's called a post-fader send that means that it's coming after the fader in the signal path this allows us to turn the fader down and also stop the feed into the reverb which is very useful on stage and in the studio if the effects bus wasn't post fader you'd still be hearing the reverb ringing through the master output a monitor send on the other hand is usually pre fader because you don't want adjustments you're making to the faders to change the mix that's being fed to your musicians continuing down our channel strip we have our pan control which we discussed earlier mute buttons and then we have our assignment switches now we've been using left and right to feed our main output but in the case of this Mackie we also have a second bus a sub 1/2 bus and we can engage that by hitting the one two switch we can route that sub one to bus to a separate output maybe a second set of speakers maybe to a recorder or we can actually blend that back in with our main so we could create a sub mix of all our our drums and have it on one fader and have that cascade into the main output by assigning it here the final stop on the channel strip is our fader which controls the channels volume as you see once we've learned one channel strip those same concepts apply all the way across the mixer now there are some differences in the channels here we talked about how on channels 1 & 2 we have mic line and instrument level inputs on channels 3 & 4 we have mic and line inputs on channels 5 6 7 8 & 9 10 we actually have stereo inputs so we could feed a single microphone in here or we could plug a stereo signal directly in and get both channels at once through the same channel strip very convenient for things like a music player or a stereo keyboard notice that those stereo channels don't have a compressor but they do still have our gain control EQ section our two buses pan and so on the final channel on a Mackey mixer is designed for music playback so we have an eighth inch Jack for a music player but we also have a USB input and we can engage that using the switch so the channel strips are the first part of the mixer the second part is the master section and that's where our master fader is a control room send for adjusting sound of speakers that might be in a studio we also have a headphone jack and accompanying volume control our main meters the 48 volts which engages phantom power so we could use condenser mic phones which require external power with this mixer simply engage that by hitting the switch next to that we have our sub 1 2 which is a second bus that we can either use independently or out into the main master output we've got a fader for that we can route it to headphones we could blend in the USB input and so on the third master strip over here is our effects return this is bringing the sound back from the effects processor it's where we adjust the returning level of our reverb for example we can choose to bus that to our monitors so our musicians can hear reverb on stage and then we have our aux master as well which we talked about earlier at the top of the master section is our Jack field monitor send effects send our main master outputs on both XLR and quarter-inch we've got control room outputs if we're using this mixer in a studio the sub output takes its signal from the sub 1/2 fader here then we have our headphones in a foot switch for muting the effects engine a mixer may or may not have built-in effects in this case it does the gig effects we've got 24 different types of effects we choose those by simply turning the knob and hitting the switch in this case we also have an effects mute switch which is a very handy function because when you're talking on stage between songs you don't want reverb on that signal at its heart a mixer allows you to bring multiple signals in process them in varying ways with effects with EQ adjust the balance between the different signals and control their routing the functionality we've learned with this Mackie analog mixer is the same functionality that applies to virtually all mixers whether you have an analog mixer a digital mixer a virtual mixer running inside your daun your computer all the functions are the same the EQ the busing the input the gain control the fader all identical functions whether you're on a huge studio console or you're on a super compact live soundboard if you have questions about mixers what they do how they work and which one might be right for you contact your Sweetwater sales engineer or visit Sweetwater comm I'm Mitch Gallagher from Sweetwater
2. Audio Mixer Buying Guide | A Checklist Before You Buy!
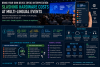
If you're shopping for a mixer and feeling a bit overwhelmed by all of the options, you're going to find this video very helpful. I want to introduce you to some important terms, show you the various types of mixers, and walk you through the three most important factors to consider when choosing mixer. All of that's coming up, but if this is our first time meeting, my name is Kyle. Welcome to Audio University. First, let's take a look at a few different types of mixers. This will give you a general idea of which mixer you need, based on how you plan to use it. The most common type is an analog mixer. Analog mixers come in a vast range of sizes and costs. If you just need a simple mixer that will allow you to route a few signals between a few devices, something small like the Allen & Heath ZEDi-10 might be a good fit. In fact, I posted a video all about the ZEDi-10 a few weeks ago. On the other hand, if you need to mix a full band with effects and matrix'ed outputs, you're going to need something a lot bigger. Analog consoles like the Midas Heritage 3000 and the SSL Duality offer dozens of inputs, outputs, auxes, and other routing options. And as you can imagine, there are endless options between these two extremes. One great thing about an analog mixer is that once you learn how to use one of them, you'll probably feel comfortable operating just about any other analog mixer. One drawback, however, is that the more inputs, outputs, and routing options you need, the bigger and heavier the console will be. That brings us to one of the main benefits of a digital mixing console. With digital mixers, you can fit a lot of functionality and power into a very small area, because you don't need analog circuits for every channel. Take for example the Behringer X32. It can facilitate up to 40 channels and 16 mix buses. To get that same functionality out of analog gear would require a much larger and more expensive console, not to mention a full rack of outboard gear, which brings me to another big benefit of digital consoles. Most digital mixers have effects like EQ, compression, reverb, and delay built-in. Not only that, but you can pre-program a digital console's settings and recall different presets for each event. That makes them an excellent choice for tours, churches, and clubs. The third type of mixer I want to talk about is actually more of a feature that can be found on a variety of mixers. That's a built-in audio interface with usb connectivity. Many analog and digital mixers offer the ability to connect to a computer for multi-track recording. For example, the ZEDi-10 that I mentioned earlier can facilitate 4-track recording directly into your recording software. The X32 I mentioned earlier can facilitate 32-track recording. While there are other methods for recording that I'll point out later, this method is by far the simplest and usually the most economical. A powered mixer is a mixer that has a built-in amplifier for powering speakers, which makes them a great choice for rehearsal spaces or portable pa systems. While the features of a powered mixer are relatively limited, the portability and simplicity might make them an ideal choice for some users. You simply plug the mixer into the wall for power and then connect the microphones and speakers directly to the mixer with no need for external amplifiers. While a control surface might look like a mixer, it doesn't actually provide any signal processing or routing capabilities. Control surfaces are simply tools that provide mixer-like control of a DAW or recording software. Some digital mixers can be used as control surfaces, but not all of them and it's important to keep this distinction in mind. Now that you've seen an overview of the types of mixers that are available, let's get into some key factors to consider when shopping. Before we do, I want to let you know that links to all of the mixers mentioned in this video and some other recommendations can be found in the description of this video and in the full post. If you buy through these links, a portion of your purchase will go toward Audio University at no extra cost to you. The first thing you'll want to decide is how many inputs and outputs you'll need. This is probably the most important factor and will give you a rough idea of how much you can expect to spend. Make sure to consider the various types of inputs that are available. For example, in order to connect a microphone to the mixer, you'll need a mic level input. You can't just connect a mic directly into a line level input. Learn more about the difference by watching this video on mic level versus line level. The main difference between a mic level and line level input is the preamp. Make sure you pick a mixer that has a microphone preamp for every microphone that you wish to connect. In most situations you'll want to route audio to at least one pair of outputs that will be connected to your main left and right speakers. However, in many situations you'll need some additional outputs. For example, perhaps you will connect the main outputs to the main speakers but, in addition to the main speakers, you might also want to route signals to some stage monitors so that the performers can hear themselves. In this case, you'll want a mixer that has some additional auxiliary outputs that can be connected to those stage monitors. If you plan to use any outboard effects processors, you'll need to get a mixer with either inserts for EQs, gates, and compressors or effect sends for outboard reverbs and delays. Unless you've got a collection of outboard gear already, I'd personally recommend starting with a digital console that has these effects already built-in. It will save you money, space, and setup time. As I mentioned before, some mixers have built-in USB interfaces that route audio into a computer to be recorded or streamed. This is by far the most streamlined way to make multitrack recordings, where each input is recorded to a separate track in your recording software. If you're using a mixer that doesn't have USB connectivity, you can still record, you'll just need a separate audio interface. You could mix all the inputs together in the mixer and send the mix down into your audio interface. Just remember that you won't be able to individually control the inputs after recording with this method. Alternatively, you could connect the direct outputs of each channel to your interface. To keep all the inputs on separate tracks, this method would, of course, require an interface with several inputs. In addition to the analog and usb inputs and outputs we've covered at this point, some mixers offer digital inputs and outputs. The most common digital protocols you'll find are Dante, AES3, MADI and AVB. These protocols make it possible to send anywhere from a few dozen to hundreds of channels over a single cable which can be extremely advantageous in live sound and in large integrated systems. The second thing you'll want to consider is the type of effects and processing built into the mixer. If you do most of you're mixing in a DAW, you probably won't need many effects on your mixer. The DAW will provide you with all the processing tools you'll need. If you're working in live production, you'll want a mixer that has effects built-in. You might be tempted to try and run signals through a computer in real time, but this will almost certainly cause too much latency, or delay. For live performances, it's best to use the EQ, dynamics, delays, and reverbs that are running on the mixer, itself, That's why digital mixers are almost always the best choice for live sound applications, compared to analog. Even affordable digital mixers like the Behringer X32 come with the basic tools you'll need for mixing a live band. Honestly, it's incredible how powerful these consoles have become! Professional mixers like the DiGiCo SD9 offer incredible processing power and routing options. You can even find mixers like the Avid SC-48 that allow you to use your favorite plugins. In any case, make sure to choose a mixer that will at least provide the essential tools like EQ, compression, and gates. Most analog mixers do have basic EQs, but they usually don't really cut it for live mixing and feedback suppression. The third factor to consider is the set of control features. Some mixers are more basic and others offer complete customizability. As I mentioned before, analog mixers are all, more or less, the same. Each input channel has a channel strip and each bus has a master knob or fader. However, digital consoles come in a much wider variety. You may find that you need to dig through a couple of screens in order to find what you're looking for with a digital console and, while this might seem like a limiting factor, it also means that you can control a lot more on a much smaller interface. In my opinion, digital consoles with motorized faders are almost always the best option. Instead of reaching across a giant console, you can simply flip to a set of faders you want and control and adjust them right there in front of you. You should also keep an eye out for features such as group faders or DCAs, which let you control many channels with a single fader. While some high-end analog consoles have automation options, almost every digital mixer allows you to create presets and scenes. Imagine dialing in a unique mix for each band during sound check and then simply recalling those mixes throughout the show. You can even do the same thing with a separate scene for each song if you find yourself working with the same band with the same setlist night after night. In an ideal world, your mixer will always be perfectly located in the center of the audience so that you can hear what the audience is hearing while you're mixing. But in reality, your mixer might be tucked away behind the stage somewhere which makes it difficult to hear what you're doing while you're controlling the mixer. This is where wireless control comes into play. Most digital mixers can be connected to Wi-Fi routers and controlled by a tablet remotely. So, while the mixer is beside the stage, you can be in the audience making adjustments to the faders and the effects while you're in front of the speakers. Again check out the full post for some links to some of my favorite mixers. If you found this video helpful, hit the "Like" button and I'll see you in the next one.
3. AUDIO MIXER TUTORIAL | How to Use A Mixer for Live Sound & Studio Recording
In this video, you'll learn how to use an audio mixing console. There are a few basic principles that apply to every mixer on the market. If you learn those basic principles you'll feel comfortable walking up to any analog mixer that you'll encounter. I've divided this video into sections to make it easier to understand and to make it easier for you to find the specific topic you're looking for you can find links to each section of the video in the description below. But if you're new to this channel, my name is Kyle. You can learn audio production online by checking out the weekly videos I post to the Audio University YouTube channel. For more information check out AudioUniversityOnline.com. First, let's take a look at the different sections of a mixer by dividing the mixer into sections. You'll realize that it's not nearly as complicated as it looks. Either on the top or the rear panel of the console, you'll find the inputs and outputs. This is where you connect input devices such as microphones and output devices such as speakers. On the left portion of the console, you'll find a bank of channel strips. Each vertical column of knobs, buttons, and faders represents an individual input channel. That set of controls simply repeats itself again and again for each input. You can see that this console has ten mono channel strips and two stereo channel strips. On the right part of the console, you'll find the master sections. This gives us basic control over each of our outputs - master fader, group faders, aux master knobs, and matrix master knobs. The first step in a basic setup is to connect the main outputs to the main speakers or pa system. To do this, I'll connect the left and right output of the mixer to the inputs of my main amplifier. The level of these outputs is controlled by the master fader, usually found in the bottom right hand corner of the mixer. In this case I'm also going to use auxiliary output 1 and 2 to feed some powered stage monitors so that the musicians on stage can hear themselves play. The level of each aux output is controlled by the aux master knob, found in this section. Now that we've set up the destinations, let's plug in some audio sources so that we have audio signals to send to those destinations. This mixer has 10 channels that accept line level or microphone level signals. I'll plug in a dynamic microphone for vocals into channel 1 with an XLR cable and a condenser microphone for guitar into channel 2 with an XLR cable. I could also connect a line level device, such as a drum sequencer into one of these channels using a quarter inch TRS or TS cable. If you want to apply the same processing to a pair of signals, such as a left and right channel of background music, you can use one of the four stereo line inputs found on this mixer. I'll connect my smartphone to one of these stereo channels with a 3.5 millimeter to dual quarter inch TS adapter. Your mixer may have insert jacks on some channels. An insert gives you a way to insert an outboard piece of gear into the signal chain. To use this, you'll need an insert cable. It's a TRS quarter-inch on one end that goes to the mixer. The mixer sends the signal out one of the TS connectors on the insert cable that goes to the outboard piece of gear. The outboard gear processes the signal and sends it out through the other TS connector, which returns the signal to the channel strip. The signals that come out of the direct outs won't be affected by the adjustments you make on the mixer. That makes it great for sending to an outboard multi-track recording device so that you can mix those tracks later and the recorded tracks aren't affected by what you're doing for the live show. Let's go through a channel strip from top to bottom to see what type of control this mixer offers us on each individual input signal. At the top of each channel strip you may see a phantom power switch. Some microphones, such as condenser mics, require external power to function. The microphone I've plugged into channel 1 is a dynamic microphone which doesn't require phantom power. However, the microphone plugged into channel 2 is a condenser microphone, so I'll engage the phantom power switch on channel 2. On some consoles there is only a single switch that controls phantom power on all channels. At the bottom of each channel strip you'll find a fader and some basic routing buttons. I want all of the input signals to be routed to the main speakers. To do that, I'll engage the L-R button on all of the input channels. Let's double check that the master fader is at unity so that the signals sent to the fader are passed through to the main outputs. Remember - the master fader controls the output level of the main outputs. Each input channel strip has a fader, too. These faders determine the level of the signal sent to the master fader. It's best to start with faders at unity. When a fader is set to unity it won't boost or cut the signal. It just lets the signal pass through. The fader also operates on a logarithmic scale, which means that the same movement of the fader would be a small adjustment around the 0dB mark and a much bigger adjustment the further you get from the 0dB mark. Working around 0 dB gives you the finest control over the signal level. If you'd like to listen to a specific input through headphones, you can connect your headphones to the console and use the solo or PFL button on that specific input channel. PFL stands for pre fader listen, so pressing that button will allow you to listen to that input regardless of the position of the fader. And finally, the mute button will stop all audio on a specific input. Once you've routed your input channel to the main speakers or the headphones, the first thing you should adjust is the preamp gain. This knob determines the input level of the audio source. I recommend adjusting the preamp gain according to how loud that input needs to be in the final mix while keeping the input faders and the master fader set to unity. As you adjust the knob you should start to hear the signal through the speakers and see your meters jump. If the speakers are way too loud, I'd recommend fixing that by turning down the amplifier rather than fixing it by adjusting the master fader. The pad switch will allow you to attenuate an input by 10 or 20 dB, depending on which console you're using. This is helpful when recording really loud instruments such as a snare drum or very sensitive microphones. This mixer has a high pass filter marked with the letters HPF. A high pass filter will reduce all frequencies below a certain point. To learn more about high pass filters, watch this video I made all about how they work and how to use them. The equalizer section of this channel strip gives me four bands of EQ - high, high-mid, low-mid, and low. First I need to engage the equalizer section by pressing the EQ In button. The high frequency and low frequency EQs on this mixer have a fixed frequency band. Turning the knob clockwise will boost that frequency band and turning the knob counterclockwise will reduce that frequency band. The high-mid band and low-mid bands on this EQ give me the option to select the frequency band. I can choose the frequency bands I want to adjust with the green Frequency knob and determine how much to boost or cut those frequency bands with the blue Gain knob. In the first section of this video, I set up auxiliary outputs 1 and 2 to feed powered speakers on stage for the musicians to hear themselves. By using the aux sends on each input, I can determine how much of each source is routed to those on-stage monitors. Let's first double check that the aux master knobs are set to unity. The vocalist's stage monitor is connected to aux output 1. I'll send the vocalist a bit of vocal microphone and a bit of guitar microphone. The guitarist's stage monitor is connected to aux output 2. Let's send the guitarist some of the vocal microphone. The Pre and Post buttons determine if the signal will be affected by the channel faders. Pre means pre-fader and it won't be affected by the fader. Post means post-fader and it will be affected by the fader position. If you have two main speakers - a left speaker and a right speaker - the pan knob lets you create a stereo image between those two speakers. I made a whole video on how stereo imaging works that you can watch by clicking this link. You can find the full mixing console tutorial at audiouniversityonline.com/mixing-console-tutorial/. Hit the "Like" button if you found this video helpful and check out one of these videos to learn more about audio production.
4. My Dream Mixing Desk: Yamaha Nuage | Unboxing & Installing
my victory oh yeah oh yeah bang wait let me turn this on yup i have straight wow all right what a vision hi and welcome to dr max how are you guys doing you're happy you being safe lovely today is a very special day for me one of the dreams of musicians is to have a big mixing desk where you can route all of your inputs control all of your sounds and this dream has come true for me today because i've got the yamaha nuage it's a very powerful mixing desk here you got one two three four five six seven eight a million boxes because this system is modular in this case i've asked for an extremely high number of inputs yamaha was gracious enough to let me have a console it doesn't belong to me but i can basically use it for pretty much as long as i want i would say that it is time for me to unbox this stuff oh well these are the monitors we're going to unbox them last first i want one of these big boys they are heavy this stuff has been hanging around for a while because the studio wasn't finished we all had some delays because of covid so it's finally ready to be unboxed so this is clearly one of the mixing modules it's got 16 faders look at it look at it i guess this is oh yeah this is to link the different units oh yeah these are all the papers which i'm gonna diligently put aside this is so exciting all right box number one done box number two i'm not even sure what's in these boxes because it's a modular system i know a little bit about it but not much really i'm finding out with you today okay this is the mouse pad if you will yeah wow you're heavy my man this is heavier than the other bit more papers nice this i guess goes anywhere doesn't it don't know what this is oh but this is clearly for the keyboard cool mouse keyboard you can put some racks here probably we'll find that out so for now we're gonna put this on this side and let's pull out another big one working units okay let's try this one come on claudia you can do it you can do it yes this is a heavy unboxing man this is another link link what does this do boom boom instructions all right let's check this one out yes we got one more of these bits this is going to be a large desk i'm telling you now here we have a control surface okay yes dante accelerated audio interface yes this goes into my computer maybe i'm sure this will be a multi-part video because i don't count on being able to set it all up today in one go three two one wow oh ultra wow this on the side again so this goes here i don't know where this goes i'll put it on a side oh this is my desk it's my brand new desk so now we're talking about the interfaces each one of these if i got this correct are 16 channels of audio and i've got quite a few of them man yes yes we got some plugs more instructions right one more now in here we also have hdmi cables ethernet cables more power yep oh this is different what is this i have no idea this is gonna be the biggest unboxing of my life you know what let me check out this one because i think this is an extra audio interface i think this might have been like a demo unit that had no box that's why it's been shipped like this i believe this is another interface all right interface this one what else so i think this this we can get rid of yes more connectivity yeah yep yep red cable yes another one yep that and more of the same what is it 16 more channels yeah i've got a lot of channels baby finally we have this box which says netgear i suspect this is a hub what is this lots of ethernet cables yeah it's a hub you know what's interesting i have a very similar hub i mean it's not as cool and blue like this one but i have it installed in the studio itself and i also have two ethernet connections data points per wall this may mean that i might be able to maybe put some of the converters some of the audio interfaces on that side of the room we will know soon that that that this right so that's done it's time for me to unbox this monitors materials style there you go baby industry standard bang yes and speaker number two attack say hello to my little desk oh by the way this is the amount of stuff that i've got to get rid of i'm gonna put it in the storage and that's my input output connectivity so in the meantime my friend carlo has come here to give me a hand carlo where are you come come in front of the camera don't be shy you've seen this man before he's helped me do a lot in the studio actually yeah i know i know wait look yeah go let's unbox those monitors so below the desk is this table you know it's not ideal i mean i've used this piano keyboard stance so it does hold the weight but the problem with this is that we don't have enough room back here to rest the monitors so maybe we could slide this underneath there it may just about work no way we can fit all three of them the monitors i bought carlo we managed to fill up the studio remember the first day we were here oh this is so big thanks carlo can i peel it off please noise oh by the way if there is any manufacturer of studio desks i could use some help here it's like i'm having this beautiful amazing desk on a teeny weeny little piece of wood that ain't right is it and there you go the beauty of this monitors you can look at them at any angle and you can still see them the enterprise yes captain kirk because we don't have enough space in the back so carlo is fitting an extension of the table yeah that's fine and there you go now we have a little bit more space back there yes oh yes now i can sleep yeah boom yeah now he looks the part man [Laughter] so now i've extracted the pc by the way this is the dr mix pc optimized for audio you can actually get it on scan dot co dot uk and i'm gonna leave a link in the description so to power it even more we're gonna use this card which apparently can hold three monitors right oh i see let's open this guy up let's dust this a little bit this is a wi-fi card i'm not sure that i need a wi-fi card right there you go so let's try and fit this right in here oh i have to remove this claudia done so now we have a gigabyte video card in here and if you don't like it gigabyte me right the desk is on the computer is ready there's just one thing that i haven't decided though the switch that they've given me gigabit switch which is not different from the one that i use do you know what i'm going to do for now i'm gonna install it huh that may be yamaha hello james amazing i am shooting the video as we speak i run already a network here is that possible that i can connect the desk and the computer to my existing network can you see your switch or are you able to give me the model number oh yeah yeah yeah absolutely so james i've got the thing set up on the table looking sexy i've got the video card that you suggested installed in my pc so all i need to do is to connect that router all the ethernet ports power it up and yeah i'm good to go yes it should be too many too many connections left uh keep your screen set up and up and running uh get that all connected to the computer uh don't they network all up with your um dante accelerator card that'll go in your in your pc tower the aic 128 okay i have to put it in my pc and that's what i connect to the switch correct yeah you got that yes and then the other information channel is going to the master console the red card goes inside the pc talks to the netgear switch and the net gear switch is connected to up today and everything the drivers and then get the workstation on the go which then it should all start talking to each other dude i'm so happy i can barely keep my hat on i'm looking forward to seeing the video with that smile yeah thanks so much james i'll see you sometimes yeah yeah look forward to claudio many thanks mike yeah thank you man oh this is a great time for you to check the link in the description right carlo yeah i spoke to yamaha i need to put this card inside this so maybe whilst i do that could you please move that stuff here we want to tower it up yeah yeah okay on the floor yeah on the dance floor back to the computer right attack yeah well it's not really completely super well plugged in anyway i think it should work so what do you say this to the left and then all of those cards in the middle yeah yeah in the meantime carlo had a stroke of genius and that's what we're going to use to put those in a momentary way maybe carlo i should give it a clean shouldn't i yeah yeah let's do this oh yeah nuage listeners because i'm worth it wow look at that man wow yeah yeah put that on top and there you go talk about tower of power so now you're gonna just slide it in now you're bragging look at it [Music] carlothehandyman.com yeah right we got that we got that we got this yeah right one and two so now i'm behind the desk i connect this boom and i connect this boom yeah as long as you will have a studio you will be crawling no matter how big it is and boom all right so we connect this one to say 12 and we go to the bottom with this one um which one is to be connected maybe we should read the manual before we do this yeah we found a video on the dante card last few cables this mini switch here i don't know if you can see it that tells you which unit is assigned to which number i put them one two three and four so we got this cabled up you want to do the owners and plug them in yeah do you do you think our number of sockets will be sufficient ah you want me to go buy a six way or something [Laughter] yeah last minute switch i think this is better this way ooh you can hide secrets in here no just run cables right yep nice and that's the mouse i'm getting there let's start powering this up tuck tuck tuck tuck attack yes yes that came to life as well yeah they're all going to the router is that the last monitor that we're connecting yeah yep one two three carlo is everything ready yes are the monitors straight uh i'm actually they're straight you wanna do the honors and power it on [Laughter] so we should see something happening on the monitors at some point right oh yeah so the first one is working oh power cable all right back on my knees yeah so you want power hey three two one and that's done attempt number two yes and we have liftoff now we're downloading the software for the graphic card well what oh polarizing filter i was going nuts polarizing filter by victory oh yeah oh yeah bang le mix take it see it see it see it go close go close wait let me turn this on yup i have straight we need a color wow wow all right what a vision know what i may have to remove this polarizing filter yeah much better all right i call it a day thanks carlo i love you carlo guys one thing you should definitely do check out yamaha i'm gonna leave links in the description that's right dr mix oh by the way this is the video you wanna watch next
5. The Mixing Desk That Changed My Life
hi and welcome to dr mix how you guys doing you're right i have received a lot of questions about my yamaha new age mixing desk here it is in all its beauty let me take a look at it well number one it looks amazing but uh what's important today is that after having used it for about i don't know four or five months now i am really starting to enjoy it in its full potential today i want to explain how i use it how my studio is set up and what i like about it so firstly in my setup i've got this mix 16 faders module and this centerpiece module this is extremely good quality everything is of course metal as you can see these faders are touch sensitive so you know what i'm gonna turn this camera down like this so that you can see exactly how this works so one of the very useful things that having a desk allows you to do is things like this you select this channel you select this channel while holding this channel now you got everything selected you hit link and you go like this which is not only extremely cool but extremely helpful because as much as i like a mouse having a physical relationship to my tracks helps a lot it makes the process a lot faster but however i got it set up to understand that i have to explain that this is the control section whilst here we have the actual uh converters firstly i should be a lot more tidy but you know i reuse it in real life so that's what happens in real life the quality of these converters is quite astounding these are like line inputs and outputs this is a module with 16 preamps the preamps on this guy are quite stunning i should say amazing so then you have one more here one more here and because they all connect via the ethernet you can have a unit back here you see what i'm talking about so this is 16 more inputs and outputs and this i use for this section of the studio and as you can see it goes through a simple cat seven i believe cut six or something like that at some point i'm gonna pass this cable through this bed here and have it all around pass through there so that i don't have to trip in it but i have been a little bit lazy i apologize for that but uh you know the thing is it works great already so this is the system and you may ask how does it all come together with all these bits and bobs so this is the nuage work group where pretty much you can match the cubase session with every bit and bob in the system so you can see the nuage master here the nuage fader here and you can see the four neo interfaces if you want to check on the real interface then you pull out this baby which is a dedicated uh interface because i mean as you can imagine you have a lot more control like you can tell how much gain you want on each channel and this is fantastic so that's that finally you have this piece of software which basically runs your dante interface you have to imagine that to run all these pieces of gear you need a very powerful interface that goes into the computer in this case i'm using a dedicated yamaha interface which talks dante and dante allows you to pretty much match through this matrix any input to any output as you can clearly see here like for example i am repeating this output right now i can't remember exactly why i did this but you know to give you an example if i want to record and use cubase of course i can do that but at the same time i want to record onto this recorder so basically i am doubling up the output to go both to the monitors and that recorder let me demonstrate so this goes out from cubase but it also goes into my recorder i tend to use very low levels because this console is really really silent it's really really clean so i don't need to record too loud just in case you know sometimes i get carried away i start banging on those keys and i want to maintain a level of headroom that prevents me from clipping so now how do i keep it all connected well this is the great news that i have 72 inputs on the system this allows me to literally keep everything connected at all times and when i say at all times i mean 808 909 ms-20 [Music] vp 550 profit five and my roads of course my mug and uh and everything in fact let me show you what is double grade about this because it runs on cubase every time i set up a new channel i have the chance of pressing this button and here you can see on the channel strip a noise gate so for example this is the 606 see if i can get any sound out of it you see so the gates are open or closed this means that the entire system is silent i've got 72 inputs and the whole system is completely silent let me enjoy this for a second [Music] don't get me wrong i love analog desks but being able to have 72 inputs and no noise that's a game changer of course a sophisticated system like this allow me to do things like take the roads right here and if i go to my sand you see i've got a whole bunch of sands here and i'm sending for example to the uh rc 505 what is the rc 505 this guy so that means that i can go from my roads for example to the desk back to the rc 505 and back to the desk again maintaining all the correct levels like this [Music] you see what i mean this blows my mind because i've never been able to do this the typical situation where you are in a studio is oh i want to play that instrument wait let me look for the cables okay let's patch it in input output level ah finally i can record this thing that time is gone yes so let me show you a few interesting features because my goal is to use less and less of the computer keyboard and mouse you see how far it is because i don't want to use it so i've been making a point out of trying to use as much as possible this interface so the transportation is inevitably the thing that you use the most when you're producing because now you can just go back and forth like this on the timeline say for example if i want to record this roads this roads right here all right i have this channel selected it shows it it's the roads the eye now this all i need to do is hit record and then maybe say locate zero and now i'm going to zero on the timeline i just hit this guy no that wasn't a cue for you yeah of course you know why because i've synchronized it uh for it to work with everything else through the multi-clock but for now i'm just gonna turn the multi-clock off and i'm gonna do this again press the button undo bang let's hit it again [Music] [Music] [Music] no idea what that was but one thing is for sure i got it captured and it's right there so now if i hit this zoom button and i move this wheel check what happens all right i uh now remove the zoom function and i go through it i can of course play it and if i want to remove the click i don't have to touch this guy all i need to do is go here and remove the click and i'm on but i can do more than that i can hit for example the scrub mode there you go check out dj claudio well admittedly using this beautiful machine just to scratch is a little bit of an overkill but fun nonetheless isn't it so as you can see the stuff that usually would have taken me quite a few clicks now it's just immediate so let me see what could i do now probably i could add some mini mug to this why not easy peasy lemon squeezy remove the rack here and i have got the mini mug right here hit rack on that one select just to remind me what i'm doing and remove the scrub now and hit the click button again and hit this [Music] i'm surprised i didn't remember the quotes that i played earlier so as you can tell that was pretty straightforward it was super fast you know what i'm gonna do i am going to connect this multi-clock again i am going to tell the roland to go in synchronization mode with uh the multi-clock let's see if this works [Music] [Music] sorry how long did that take me one split second and you want to check out what the best news is i've got everything right here so if i say for example select the 808 kick drum now i am presented with that right which is also that so all i need to do is i press select here press select here bang i'm gonna go link bang i'm gonna hit record like that now everything is set up i just need to go back to the beginning maybe i can turn off the 808 for a second i am going to make sure that nothing else is selected or the 909 i don't need actually so yeah we got everything going this is going so record hit that [Music] [Music] remove the click stop can just go back and play [Music] how long did that take me i have an 808 recorded as separate tracks i've got my base i've got my roads this idea took me one second to put down and i've got it all separate on separate channels i could just you know send it off to the mastering mixing room and you know they can finish it [Laughter] actually that's not a bad song right the last thing i think i want to show you is the capability of adding effects to this i'm just gonna go back maybe remove the links so say that for example i want to add some nice delay to let's say the clubs all right so this collapse let's go to sense for now i have as i sand i've got where this is going oh to medium reverb let's put something nicer than this how about my 555 which is my super fancy tape delay that's added all the way up as you will notice i have connected the um 555 straight into the desk again and i'm adding to the delay of the five five five i'm adding a little bit of reverb also i haven't set it an auto pan because the 555 is actually mono the delay portion and and the reverb portion of it all i need to do is play [Music] which reminds me i was also sending the base to it so bank there you go and this is um how this desk has changed my life i really want to thank the lovely people at yamaha because they allow me to use this absolute monster this beauty this work of art uh in my studio i hope i can keep on using it for much longer because it seriously changed my production life so having said that i wish you a lot of beautiful inspiration energy and love for music i invite you to watch this video next and i will see you next time on this channel thank you
6. Using a MIXING DESK – the basics and what you need to know.
okay so this is a basic mixing desk and I'm going to show you the functions of something like this I get lots of people who come up to me at gigs and see a mixing desk and they're not musicians and they say how do you know what they all do the answer is it's quite simple because all of these twelve things or twenty-four thirty-two however many you have on your mixing desk they are all identical circuits now on this we've got twelve inputs and each of those inputs can be controlled separately and the volumes can be set separately you can plug mics or iPods or instruments or anything into either any of these channels here I'm going to wear headphones because I'm going to be listening to the mixing desk output which is what you're hearing at the moment so this mic that I'm speaking to you at the moment on comes in on channel 12 I've plugged it in to the desk via the mic input and I can do all sorts of things like changing the volume of it so he so you didn't hear anything there cuz I'll just turn the output all the way down I can turn it up new bitmap and I can also change the equalization of it that is the bass middle and treble so I can make it sound really crisp and trevally or I can strip all the treble off the bass end would be and I can cut that off as well and there's a mid-range thing there so it makes it all sound a bit nasally or you can take that away make it sound like a radio broadcast other mixing desks have slightly finer control over the EQ but essentially that's it you get a top a bottom and a middle kind of thing we have a series of other controls here now the first thing I'm going to show you is how we set the channel up now for this I'm going to grab another microphone here with a mic connector and I'm going to plug it into the next channel along which is channel 11 so I'm going to shut channel 12 now so you won't hear anything the next thing you will be hearing is the output of this battered microphone here two two two two there we go there is so this is a vocal mic that you use on stage so channel 12 which is my condenser microphone here was was picking me up now it's this one two two two two two two now the first thing you need to do as you can hear it's a little bit quieter at the moment and the reason for that is that the top control on most mixing desks which is called gain or trim or something like that the top control allows you to set the input level of your mic or line instrument so what I have to do first is bring the fader to the bottom or I'm gonna take it slightly lower so that you can still hear what I'm saying and I'm going to twist the gain control here one two two two two two one two two eight one two two two two two two now you can see that the red light has come on on the bottom of the channel here most of mixing desks will have these lights if they're unlabeled as they are here it points to a problem you can hear that it's distorted so at the moment my input volume is too high now it's important to get this right because the mixing desk needs to be able to use a nice healthy level but not too much or too little too much you get distortion too little you get lots of noise and hiss and all sorts so I'm going to bring the game back a little bit now bring my fader up there we go so that is sounding much cleaner it's a vocal mic this one so I'm just going to put a little bit of mid-range and a little bit of top end so that when I sing through my PA system it's a little bit clearer now notice that it's very fine fine control here with the EQ if you're having to add lots and lots of equalization the chances are there's something wrong with the mic or the the drum is not tuned properly or there's a problem somewhere else you shouldn't have to add masses of EQ so there is a pan control here so I'm going to go to the left pen side here if you're listening on headphones on this demo you'll hear the signal sweeping from left one all the way to right now as an aside you hear will do won't do in mics when they have sound checking there's a reason for that one two contains all the frequencies most of the frequencies across the band the one you get a lot of bass and that of two you get all your top end and then everything else in between so it's a legitimate thing to say one two one two one two gives you a lot of control a lot of awareness over the tone of it now this is an old mixing desk so it doesn't have reverb built in like most new mixing desks do but I've connected this up to one of my old reverb units in the rack over here and you'll be able to hear that I can add reverb to it to my voice now that's what these other controls are there called monitors or effects or whatever so I'm going to turn up effects B and there's usually a master control as well and then there's a return level where it will suddenly get really really [Music] so I can add effects I can even send effects back to the front of stage monitors lots of vocalists like a little bit of reverb it just enables them to have a little bit more clarity with their voice over the rest of the band now that's a mic input there so I'm just going to bring up this mic again which is a bit of a nicer one to use for narration so next I'm going to show you the iPod I'm just going to plug the an iPod into a line input level now usually your output of your iPod if you are using a headphone jack will have two jacks on the other end one for left and one for right so if I plug these two this ipod into let's put a get into seven and eight channels seven and eight grab my iPod and I've got something here that I partly own the copyright to so that's not going to be an issue and now I'm going to make sure that my equalization to start with these sets centrally and I'm going to set the gain controls so that they are yeah now very occasionally the red lights light up the output of an iPod is actually quite low is much lower than a CD player or a professional music player so you have to set the gains usually quite high on this so I'm going to now push up the faders seven and eight at the moment the pan control of each one is set centrally but ideally because I've got two channels left and right I'm gonna pan eat and pan the left channel to left and the right channel to right so you get your stereo image now I'm going to put it back into mono and there we go so I've got completely independent control over my iPod I can even add reverb to it if I want it not that you want to so the other thing that you can do on many of these mixing there see smaller desks is that you can plug the iPod into a dedicated tape input showing its age rather tape input means just a CD player or a mini disc player off as a blast from the past or an iPod again so I've just got one of these leads that has two of the photos here and I'm just gonna plug those in and back into my iPod and there's usually a level control a level input just on a single control it automatically pans the left channel to the left output and the right output now mixing desks I'm set to have things called busses and actually that's a really good way of thinking about it confusingly a bus on a mixing desk has a double s but it works just like the conventional bus you've got 12 people waiting at 12 different bus stops they all get on the bus and the bus ends up at its destination and that is exactly how a mixing this works and that is really that's this that's a basic mixing desk but it's really quite a powerful tool and hopefully now you've got some idea of how to to use it effectively in a band situation
7. Best Audio Mixer – Xtreme Acoustics XAMXB4 Review & Test | Mixer For Home Studio Setup
@SultanOfficial
8. BEST AUDIO MIXER!
choosing the best home studio mixer or mixing desk is a challenge not least because they come in different shapes and sizes we've seen a wide range of musicians and performers use mixers for quite a few applications some djs and mcs others musicians who perform live and not to mention those in a studio adding to the recording equipment arsenal even if they aren't digital like many go for today most use music software as technology grows analog mixers are also popular so if you're looking for one then we can help you out with some of the best in the business go through the description below to see all of the featured products and their buying links our list begins with the rockville rpm45 mixer it is a 4 channel wood cabinet powered mixer with usb and is one of the best sounding powered mixers on the market it has an adjustable delay and echoes effect along with individual controls on each channel for reverb bass and treble this mixer comes with a built-in usb input giving you an additional playback option the power amp built into this mixer is 225 by 2 rms at 8 ohms and 300 by 2 rms at 4 ohms this powered mixer is rugged and tough plus it is enclosed in a high quality wooden enclosure which can take a real beating next up on the list we have the mookie mam x1 mixer it has four quarter inch trs inputs and a quarter inch trs output and the channels are stereo you can use the four volume knobs of stereo mixer led on the front panel to adjust each input level each channel has added switching buttons making switching between mono and stereo audio input more convenient and intuitive this mixer is suitable for dc five volt power supply mode which is convenient for customers to use on multiple occasions it produces the highest sound quality at all output levels boasting ultra low noise operational for outstanding audio performance distortion free and easy to set up ideal for quickly mixing four line level signals without complications the 4 channel mixer can maintain the most integrity and produce the highest sound quality even at the highest volume this audio mixer collects sound from many different sources into a monitoring position for monitoring or routing up next on the list we have the mackie 402 vl z4 mixer this 4 channel ultra compact mixer features onyx microphone preamps in an ultra compact design and is suitable for professional low input applications the mixer is built like a tank with a rugged solid steel chassis and high contrast controls for discernible tactile control its bottom panel features three non-threaded holes that allow it to be fitted with an optional microphone stand adapter this lets you support the mixer on a standard microphone stand and adjust its height and level to whatever suits your preference with the high visibility high contrast controls deliver useful at-a-glance visual feedback from every input to every output the mixer is designed to provide the highest headroom and lowest noise possible for maximum signal integrity the mackie pro fx v3 mixer is a six channel mixing console featuring two onyx microphone preamps with 60 decibels of headroom and a built-in effects engine with 24 built-in effects making it well suited for live sound home recording and content creators the integrated 2x4 usb audio interface offers high quality 24 bit 192 kilohertz recording and playback with zero latency monitoring the master output is controlled with a dedicated level knob and features xlr and quarter inch connectors while the dedicated quarter inch trs headphone output includes an independent level control it uses an all new gigafex effects engine with 24 different effects options from reverbs to delays and more channels 1 and 2 offer combo xlr quarter inch mic line connections and feature high z low cut filters gain controls 2 band eq stereo linking level faders and fx send channels three and four offer two quarter inch inputs and feature a level control while channels five and six use a 3.5 millimeter stereo input with a level fader moving on next on the line we have the fifein ultra low noise 4 channel line mixer this mixer is a heavy duty metal enclosure construction stereo mixer and the knobs have firm adjustment its small size fits perfectly on top of your keyboard allowing quick and convenient changes to monitor mixes on the fly each channel on the line mixer has an independent volume control separate input plugs and volume controls for each channel with one single output for an amplifier the line mixer is ideal for multi keyboard rigs and recording where several channels need to be mixed down to one track additionally its modern design looks great on any desktop and extensive controls are easy to use and low profile to avoid snagging on wires clothes etc on the other hand it yields the highest sonic quality at all output levels boasting ultra low noise operational for outstanding audio performance the next product on the list is the pyle pmxu43bt audio mixer it is a compact 4 channel bluetooth enabled audio mixer designed to provide multi-channel mixing capabilities this mixer features two xlr quarter inch combo jack inputs and one stereo pair of quarter inch jacks the microphone preamps offer selectable 48 volt phantom power and up to 64 decibels of gain all input channels boast 3 band eq and peak indicators a per channel send knob passes the signal to the internal 16-bit dsp effects engine which has 16 selectable effects presets with a mono quarter inch aux send and returned is provided in case external effects are desired you can stream music from your mobile device the built-in bluetooth receiver or play mp3 audio files from your flash drive via the usb type a port furthermore the usb port enables audio interface functionality when connected to a computer [Music] last on the video but at the top of our list we have the yamaha mg10 stereo mixer this mixer features four mic line combo inputs with dpre mic preamps and six quarter inch line inputs with stereo level controls each of the four mics line inputs is equipped with a three band eq pan control and a high pass filter the 4d pre mic preamps feature an inverted darlington circuit and switchable 48 volt phantom power for use with dynamic and condenser microphones they also feature 26 decibels attenuation switches for recording loud sound sources such as guitar amplifiers it has stereo xlr and trs outs for connecting to your pa system or monitor speakers it also has a quarter inch headphone output with level control for personal monitoring and additional trs quarter inch stereo monitor outs for sending to powered speakers amplifiers or devices such as digital recorders thanks for watching if you liked what you saw then hit the like button and subscribe to our channel if you loved it take a moment to hit the bell icon so you'll get notified of all our new latest uploads
9. How to use an Audio Mixer
we have been to a gig your concert and you've looked at the back of the auditorium or the back of the festival and this big tent or desk setup and there's hundreds of buttons hundreds of faders hundreds of dials what do they all do well most likely they're the audio mixer which is what I thought we'd take a look at today an audio mixer is used to mix all the different sounds that you hear in our live production or even a recording so for example microphones guitars drums mix them all together to come out of one output which is the main speakers or the headphones which you listen to so let's take a look [Music] so as the name implies an audio or sound mixer mixes several different input sources of audio for example a microphone in the guitar together to one particular output here two speakers so you get your input level of the guitar and the input of the microphone you balance them together so the microphone doesn't overpower the guitar or vice versa and then you send that signal out through to the main speakers or even to a recorder see we've got the Elenin here said 24 which is a pretty standard representation of what an audio mixing desk looks like it's got 24 different inputs which are each one of these faders all along here from here onwards including 16 of them XLR which is this kind of connector which you used to plug in microphones and then forever here have these RCA connectors which is like what you've got on like a DVD player or CD player each one of the channels has a line level input so that's this particular plug it's also called a TRS plug and that's 50 plugging in things like a guitar or a keyboard which don't necessarily have this kind of connector out they have this one they also come in at different volumes so that's why a mic or Alliant level now the first knob we have here is gain so that's essentially the volume before you've set your own volume on the faders down here so we'll get to that in a second but essentially the gain is like how loud that particular microphone is so not the person singing into the microphone but how loud the microphone is just at a normal level so you said that then you move on to equalizer which is the next set of faders here there's four knobs and they control the treble the mids and in the lower or bass frequencies and they're all referred to as frequencies which is the pitch of the noise so if I wanted to control a particular frequency let's say there's a really good note right in the middle that I want to pick out and have prominent in that sound mix I choose this and I find the frequency on this black knob here so let's say I choose one kilohertz which is a frequency right in the middle and then I want to increase that frequency you can turn this blue knob up which is they're linked or I might want to decrease it so I can turn it down can similarly if I want to increase the bass notes I can turn up this lower frequency knob or if I want to if there's too much bass in this particular microphone or instrument I can turn that down the same the treble up here can increase the high notes or I can decrease the volume of the high notes next we have auxilary is which are going to more explanation later but essentially this is so I can send my sound not only to the main output but also to some auxilary outputs so for example if I'd speakers on the stage for the performers or people had headphones on that way you wanted a different sound mix to what everyone else is hearing I'd do that through auxiliaries so they're really handy then we've got a pan here that's pretty simple it just moves the sound from the left speaker or over to the right speaker so for example if you had two microphones on a drum kit one on the left side one on the right side you could send one of the microphones to the left and the other one to the right and it would sound give you a little bit of a stereo image when you're sitting or in the middle of the two speakers next we've got a mute switch pretty self-explanatory it either mutes that channel or lets the audio through and then we have a pfl so if I activate the PFL for a particular channel it sends only that channels audio through to the headphones that I have plugged in to this mixing desk so if I want to listen to a particular microphone or a particular instrument without hearing everything that's in the mitts I can pfl that particular channel and listen to that through my headphones finally you've got the fader this is just essentially volume so if you've got a really loud singer and they all quite sing a rather but then they do a really loud note so they go really loud and becoming too loud you can just pull them down and you can push them up again when they're quiet so this is generally when you see people mixing the sound stage or a concert or something they have all the faders kind of like this so they might have a really loud guitar for this particular point and then this singer is too quiet so we can push them up and then they guitars to your layout so he pulled them down and over here we find that the drum kit is the kick drum of the drum kit is too loud you can pull that one down and then we can't hear the snare at all so you can push the snare up so it's just things like that once you've set the the level of that particular microphone you can then go through and just change the audio on the fly here and it's really easy to do that starts at zero down here obviously that's having no sound coming out at all then the max sound the loudest volume we can get from that particular instrument is all the way at the top so that kind of makes sense moving over here we also got these blue faders and the blue faders just simply represent these different kind of connectors up here and each of these channels is actually two channels or a stereo channel which is like a left and a right input so for example coming out of your CD player puts out a left channel and right channel and they combined together to make this blue fader then we head over to the master section here so naturally you've got your master fader so if you have all these up but your master faders down nothing will come out the speakers so you turn them up and that controls the volume will all this mix together and what volume that comes out of there's to faders here because one's for the left and ones for the right we've also got the auxiliaries here so you plug in your own speakers on stage your fallback speakers they're known as or whatever other auxiliaries you have up here in the Orcas outs then you can control the master volume just on these two knobs here so they're kind of like this but they're in knob form not fader form because your auxiliaries you use less than the main output here you've got PA fill so your plug in your headphones just up here into either of these headphone ports and then you can choose what exactly comes through your headphones so you can pick orc swine aux - I think that's as effects of return or if you PA filled anything that bypasses that and let you listen to that particular channel or even if I select multiple channels for pfl it'll sweep them I'll just send those particular channels together now setting a mixing desk up isn't as complicated as it seems you simply get your audio source so here for example I've got a microphone plug cable in an XLR cable only goes in one way with audio always sending out of the pins and then you just plug it in so now these audio source is connected I turn the gain up so this is a pretty sensitive microphone so the volume when I talking it's very loud so I'd want to turn the gain down but if I had a less sensitive microphone that the volume came through really quietly I would turn the gain up for this particular microphone so you set the game run down decide where you want it to beep and if you want to send it out of any of your auxiliary outputs so if the people on stage if I was a singer on stage singing into this microphone I probably want to hear myself through the speakers I'd turn auxilary one and maybe two up maybe do a bit of Equalization maybe my voice has really nice bass notes so you turn that up but I might want to take the high notes out because I'm not that good there then we unmute the channel obviously decide if you want to pan up left or right and then turn me up now connecting an output is really easy as well it's just the same kind of um principle obviously you just have your um you have your cable actually connected to an output unlike here but use the end with poles not the pins because the audio sending to the speaker's through to the pins plug it in so your left speak you guys in the left output right speak you guys into the right output and you just work out how to actually get that in like that now I have a left speaker connected so because I've got this channel turned up I can go over to the master fader turn the left channel up and if I had any speakers connected that would be working right now so it's pretty easy it's not that complicated despite all the buttons thanks for watching this technology attic video on audio mixers if that gave you a little bit of insight into how large-scale production or recording works give this video a thumbs up and subscribe for more
10. How to Use an Audio Mixer Board Tutorial Mixing
in this video I'm going to teach you how to use an audio mixing board basically an audio mixing board is the central nervous system of your studio it's where all audio is routed to and from the mixer and you may not need one in this day and age an interface has built-in preamps but I personally like using a mixing board because it offers greater control and plus it allows you to do live sound gigs what you can't do with an audio interface well you can but it's a little bit less practical so here we go I'm going to get off screen pretty much for the rest of the video because we need to talk about a lot of different controls alright so this is our mixing board that we're going to be using during this tutorial on the table here we have a few different accessories that would be plugged into this mixer and to get started we have to plug in our power supply which is this little thing right here and I'm just going to do it as if you guys weren't here and I wasn't really explaining anything so it just goes in one way you got to look for there's a notch and in like that make sure your phantom power and your power switch are off before plugging in obviously and then hit your power things light up and right away I can say get the solo off of that and the mutes off of these so here's our lovely mixing board and I have one other thing I have to do in order for this whole thing to work this whole tutorial of work and that is I need to plug in the mix out into my audio interface so to do that I'm going to use what are known as TRS photo plugs and the way distinguished TRS from their their other brother brethren I can't say that word right now is this part right here this is just TS so that's tips sleeve and this is tip ring sleeve or something like that anyway the bottom line is the one on the left the gray one is unbalanced this one is balanced so you have less noise your if you have the option with your mixer board and pretty much all of them support TRS balance cables um at least the really crappy ones may not use TRS cables absolutely so actually I'm putting that to the side and the reason I'm doing that is because I want to record the mixing board along with my lavalier microphone that I have plugged in my camera right now so nothing's plugged in right now so I'm going to go in to the output our main output left and I'm going to run this cable this is going to go into my left input which is input number one on the interface all right and then TRS cable number two and yes they are a little bit more expensive than TS cables but that's just how it is this is going to go obviously into input number two of the audience ID 14 now because the audience ID for teen has the preamps within the line input I have to actually set that to a certain level and what that means is I need to run this which has a tone generator in it so on our cable tester here we can see we have three different output levels and I'm going to set this to the mic input and I'll set it to one kilohertz there's options for that as well but it involves pressing one of these buttons down here in this case you hit the reset button so what I'm going to do is see I turn that on to test tone and I press that button and when it's off its 440 when it's on it's one kilohertz and I'm going to do with all this off-camera actually you know what I should I should do this this is kind of important in case you guys have to do this so this is what the XLR looks like I'll pull it out again just so you can see it so on the output well the input side for the mixer this is what it looks like three prongs and then come on into the microphone or whatever your output is this is the female end XLR f this is XLR m and then it goes in like that your mixer board might look different by the way that's another thing I forgot to mention your mixer board will look different obviously it will operate a little bit differently but these all are basically universal principles okay so on our cable tester I'm going to put my test stone on and again my mic levels there and I want one kilohertz so all I'm going to do now is bring up my my gain knob actually I forgot to put this in solo so solo it put that up and I can't see those numbers because of that light is glaring off of it normally that's not the case so I'm going to bring it up a little bit higher so it's right on zero like that take it off a solo mode bring up the fader like that and bring up my mix my main mix knobs right here alright I'm going to look into seeing if this is actually working or not it should be and it's not at least it's not showing up there so at this point I'm going to bring it up okay it is actually outputting it's just not showing up on the meter for some reason I have the screen capture software going right now and it's showing that I have output on both of my meters so I'm just going to roll with this and go to my armed and going to both my channels here and we definitely have an alignment issue but like I said this is all about adjusting the Audient levels so I'm gonna just my my left channel first channel one so my goal is to get this around negative 20 and then my left channel I'm going to bring it up as well there we go they're both at negative twenty point one so cable testers getting pulled out and I'm gonna actually now put it in man that's that's hard to pull out sometimes all right I'm going to put this to the side the cable tester and now I'll show you plugging in a microphone very uh very interesting see what that looks like okay so like I said female in like that there's only way one way to do it and I'm going to put it right back on my mic clip all right back on the mixer board we have our XLR input as I was showing you with the microphone input and we have our line input now obviously you would use a photo cable like this at ER this is TS TRS is also available and you know that because it says Val or unbell standing forward balanced or unbalanced obviously whenever you can use a balanced line input TRS all the way next up we have what's called a low-cut filter also called normally a high-pass filter this one is at 75 Hertz and I believe it's 18 decibel per octave low cuts which I would not use it on this board unless I was mixing live and the reason is on these cheaper mixing boards the filter is not as good as if you were using software or a better one on a better mixing board so normally I have this off when I'm recording or if like I said if I'm doing something live then I'll only have it off when the bass guitar the kick drum maybe a synth or a keyboard something like that where my crumble isn't an issue or just you know popped peas you know you want to have that low-end on your bass channels next up I already talked about this this is our it's called trim or gain it's called gain on here it's called gain gain on Mackay boards what this does is it raises the volume actually the input signal is the correct term it raises the amount of input signal from our inputs so oh you know Mike obviously we're going to have it pretty high if you look closely these are also marked unfortunately the light is putting it in shadow but it says +4 and negative 10 and that's our line level distinctions I'll link to a video in the video description of the difference between professional line level and consumer line level but that's what those are referring to so I'm going to set a level now on this mixer board and on the Mac II as well we have two different modes over here it says solo and pfl and that stands for pre fader listen when we're setting levels we want to have this button switched out right now it's switched in I just pressed it so switch it out that puts us in pre fader listen mode and that is the preferred mode for setting levels so what I'm going to do and this is why it's important to do it this way you can have the fader all the way down if you can't see that I'm sorry the faders are all the way down to negative infinity and I'm going to set my level by pressing this solo button right here and then see that yellow light comes on and what does that say it says pfl okay even though this is in solo mode this isn't pre fader lesson mode so that we're only getting any of the channels that are in this a channel is basically this entire strip right here it just refers to one track of audio basically so when I raise my level up so I'm going to take my microphone off of the clip right now and just start talking into it right now I have absolutely no signal because all the way down but let's say I'm singing or I'm just giving a voice over so to see now I'm bringing it up a little bit and you can see here I'll use my other hand you can bring it up and it's getting me signal and I want to have my signal peaking no higher than like negative 6 so it's hard to see these numbers check one two check hello this is Adam this is Adam this is Adam so right around there somewhere should be good for you check check check yeah this only goes a negative seven so you don't want to go much higher than that peeking but and your average levels want to be under zero so once I set my level I can click this off and I'm in regular mood so at this point if I want to bring my channel up I will bring the fader up like so obviously we got a signal going in there and we want to keep it there for now and by the way if you don't have if you didn't have these fader I'm not going to touch these but if you didn't have these update they have to come up at this point so now we have an audio signal and that's great so again we I could press this and get rid of all the low-end check check check one two three one two three you might have heard a difference maybe not and then we have our eq's so I can boost the high-end check check check and it sounds nasty check check check check check check I can reduce it so it sounds really lo-fi I'm trying to make it so I can show this to you guys check check check I'm putting the back to the normal level by the way when you set levels you want to have your eq s all the way straight up and I didn't do that I had my mids actually reduce so that was that was bad at me to not look at that a lot of these knobs got hit when I was moving it around earlier so you should always want to have you EQ like that and then let's say I want to boost my low-end unfortunately on this mixing board our options of EQ are very limited plus the equalizer itself isn't really the greatest it's behringer here what can I say you know if you want better you should spend more money so we hope we do unfortunately have the ability to choose our center frequency in the mid-range band and we the way we do that is with this knob right here so we pick our mid-range option where ever you want to have it now usually what I'll do is I'll actually boost this all the way up whoa and then I'll find my frequency that I want like that and I think it just crackled so as you can hear it's affecting the tone of my voice as I sweep around check check check check check check check check check check and then once I find my frequency I can cut it check check all right there now I can't actually hear how good or bad that is because my computer speaker is actually the one that's in the back of the computer not my normal speakers the back of them even if they were being output through my normal speakers that really wouldn't be useful for me right now because I'm not sitting in front of those speakers so I'm just going to set all these back to flat 12 o'clock position next up we have our auxiliary sends now these two switches have an option that'll lets us send either pre fader so before this has moved around so I could have this all the way down and as long as this is pressed in like so I'll have signal coming out now I do it to keep it at zero at the 12 o'clock position for this to go on to auxilary one but as long as I have this button pressed in this fader could be down and it doesn't matter and that's actually what you want if let's say you're doing live sound and you have your auxilary sending to a stage monitor or ideally to somebody who has any ER monitors that's what you would send you would send pre fader listen or pre fader so that whenever you make adjustments it's not making adjustments to their stage monitors if they need more level you adjust it right here not down here you're up here you adjust it with the with the auxilary so if they're like I want to hear more a more snare drum you adjust it with this down here not with the rest of these unfortunately this board's small compared to ones that have like four or six or eight auxiliary sends so next up after oh so this one actually not be set to a pre fader position it is always post fader so this is only good for like in effects mix or something like that if you do use the auxiliaries for effects you want to have this out so you want to have it post fader otherwise you're running the weird issues with your wet signal sounding weird wet meaning the effect like reverb or delay being louder than your dry signal and that just doesn't sound right so you want to if you're using the auxiliaries for effects you want to have it post fader and then next up we have our pan pot our pan knob but yeah that's what I meant to say earlier these are also known as pots but I call them knobs because that's what I call them but a pot is short for pot to pot tenth ometer anyway it's not important what's important is this is our stereo pan position and when I'm recording I don't normally touch this at all except to hear what overheads sound like when they're hard pan on drums and also our pan knees if I'm liking like a stereo acoustic guitar or something else in stereo I might do it just for fun but from for live mixing you definitely typically will use these um maybe maybe not I do I personally use the pan pots when live mixing but I rarely live mix anyway onto our next button it's our PF / solo button and you saw me use that to set levels and this is also used for for when you have this button over here in solo mode and you press this what this enables you to do is to hear just that Channel now I'll zoom in so you can see these knobs a little bit better now so it lights up unless your lights broken but if it's pressed in it's in solo mode and what I can do is then hear through my headphones or my control room speakers or live mix room speakers whatever you want to call it it's a third output on this thing that will let you hear just that channel or any other channel that you press solo one so if I had those three lit up you could hear just those three channels but typically you want to do this to diagnose any problems you have let's say you start hearing noise you start hearing crackling some kind of problem with your audio and you want to hear that you know figure out what's going on you press your solo button and that will allow you to hear it just for that and you got to remember to press the button and I'll zoom it I'll zoom out now so you can see the whole board you got to remember to press this button right here to get you into the two different moods and if I have that only see now it's in the pre it's in a level setting mode if I press it in it's in my solo mood and you can't hear it right now because I had the fader down but once I push it up check check check one two three okay that you know what I just figured out why it wasn't showing stereo because it wasn't in that mood or maybe it was okay well either way it's it I don't know why it's only showing on one channel I don't I really don't know why check it's not oh well so I'll put this down against I don't hear myself on a computer on the back of this mixer you have an insert for the first eight channels so that lets you use outboard gears what it's called outboard hardware outboard meaning out of the mixing board and so you can have a better equalizer than the one that's built into this you can have a compressor on the channel you can have anything else you can think of that is not built into this mixer can be inserted into the single path and it's actually pre EQ and pre fader as well I don't know if it's post low-cut or not but um you can find out by running a signal through it and hearing if the low end goes down or not but yeah that's very important not just an insert point but we can also take those insert points and record each channel in isolation that's actually typically how I have the Mackay board set up at Studio B and you know it's just a good little setup to have it's a good option to have because you don't always have that luxury of insert points on my other mixing board I didn't have any inserts at all so this one does have that and that's how I would record you know I don't record just the stereo output I don't record the stereo output of this at all I record the inserts from the channel and it also sounds better because we're bypassing the EQ and the fader circuits the closer we are to the output of the preamp the better and also you know I forgot to mention you do need to have some outboard gear supports TRS cables so you can only you only want to plug in one cable but otherwise you need to have a TRS cable that splits into two TS cables so a stereo into a mono cable basically and what that does is it lets a send and return and if you look closely on the back of this thing it actually says on it tip equals sin and ring equals return so that's how the cable has to be wired for it to work properly up here we have it's a our sin dog or our stereo send our sorry returns and we also have stereo line input now they don't have to be stereo you can just plug it into the left one and then it becomes dual mono so to monitor signals at the same time of the same signal or we have our auxiliary sends as well so like I was saying all these knobs that control the auxiliaries the the green knobs in this case they send out the signal that's what you would plug your at your output and then again more stereo inputs and unfortunately here's where the changes there's no mid sweepable midrange you only have on this it's three kilohertz and five hundred kurz for the mid-range you don't have and these are not variable q according to the manual the Q is one octave again it's a cheaper board so you don't have those options but your mixer board may have those options variable Q is basically it controls how wide or how narrow your boost or your cuts are very useful feature and that's why I prefer nowadays digital mixing boards because those are built-in and you can have those it's a very nice feature to have and analog variable q equalizers are simply expensive okay next up we have our tape in an output so we have an RCA capable connector I used to use this a lot until I found out that Fona was the way to go and RCA is you know it is what it is but we have that if we need it so again RCA input and output stereo useful with you have somebody who wants to record like let's say you're doing a live show and a lot of times people will give you RCA stuff and you can just plug them right in here but what I want to show you right now was these two right here this is important when I first started using a mixer board at Studio B I had my cables routed the wrong way and I actually ended up almost damaging the interface I forget why I think it was because we had to use these weird adapters for it for some reason and so anyway what I ended up changing was it was being sent from the main mix output and I changed it so that it was going to from the control room output right here and what that enabled us to do is I could adjust everything with the knob down here which I is off screen right now but this knob well on this board the control room and the headphones levels are controlled by one knob but on the better maki board they're controlled separately but this is where you want to plug your control room speakers so that you can adjust the volume from right here and then the second thing I want to show you is to the right of that so right here again we have a TRS plug just like that and to keep it a little bit more organized I'll put my headphones over here and nothing nothing complicated about that it's just a quarter inch photo output so I want to come down here to our final sections which is where our meter is actually so let's see we have at the top we have our auxilary returns so these control the level coming in now it has an interesting option down here this is called FX - auxilary one so let's say our cue mix I'll call it a cue mix but it's the in-ear monitors or the stage monitors let's say that that person wanted to hear the reverb well I don't want the reverb to be that loud on their mitt on the actual mix of the audience's hearing so I could send that to them so that they hear it and you know singers a lot of times they like to hear reverb just for confidence reasons they sound better you know and it gives them confidence to sing better to sing louder to sing with more energy and we can give them that with this button now you got to be careful though because you can create a feedback loop with that but normally I would have this set so that because you're so limited on channels auxilary one would actually just get I would put the reverb on a different channel because I have way more channels over here and like I said I don't like using the stereo inputs I'm going to actually pan down now or tilt down to hear now missing the knob cover on this volume control but this would normally look like all these other ones and this controls the output of the headphones controls the output of the control room speakers the volume level okay then we also have our auxiliary sends again these control just it's just another level control and we have I think it's infinity to put 2 plus 15 decibels of gain typically you want to have that at 0 if you can avoid having a boost step because whenever you boost these cheaper channels you just add more noise and that also goes for the faders as well the faders although you can go up to another 10 decibels on the faders you really want to increase or decrease your volume with the trim or gain knob in this case now down here we have some options for what we hear in the control room so if I just wanted to hear my alternative mix which by the way you get that by pressing the mute button and at that point whatever is mute it becomes a part of this alt 3/4 channel so I can audition that or listen to that into the in the headphones and let's see so I hear my main mix the alternative mix or the RCA inputs and we can also put our tape inputs to the mix and I'm looking for a button that lets us control what the mix actually gets and I don't see it so some mixer boards will actually let you control what gets sent into the mixing into the mix but this one doesn't for whatever reason and also the the subgroup here the alt the alt 3 4 is very limited in what you can do on the Mac keyboard it there's actually four different inputs or four different faders that you control which work really well for drums I'll show you a close-up of the main mix faders down here and well I don't know why they're set like that but it doesn't even matter normally I would have them set equally I just couldn't see it because I'm not in front of the board like I normally am I'm like leaning over it but I used it I have it right at zero and you know that's called unity gain again you don't want to boost it even though even though I can bring them up I don't want to boost them like that you know because fader gain sounds nasty on cheap boards and most boards do have cheap components until you get to the really expensive level and then maybe you can get away with it but I still would advise against it if you can so one other thing I guess I should mention as I try to figure out where to zoom out from I'll just go right about here and zoom out so I got our big board alright now what are we missing from this down here normally you put board tape and board tape is specially designed so that you can tear it off night after night and you would put your input names so B for bass or K for kick drum SN for snare and so on and so on GTR for guitar VX for vocals and I could go on and on you come up with your own short hands for different inputs but that's where your tape would go right there and then you just you know divide it you put lines down here so it's a little bit easier to see and also I think they sell I think you get a glow-in-the-dark marker so you can see that even when there's no light or pen something like that but yeah that's the basics for the mixing board and I guess I should see if there's anything else left to say oh yeah there is a button that's missing from the back of this thing that it controls whether the main output is mic level or line level 99 times out of 100 you want to have that one line level so you want to have that on this one you have the button out so it's disengaged you have that option just in case whatever you're sending this mixing board to doesn't support line input if it doesn't support line input it's probably piece a piece of junk but you may run into that problem and you at least have that option protip do not run a line input signal into a mic input otherwise you're gonna have possible gear damage I may or may not have done that myself not on this board on another piece of gear and I learned my lesson from that here's another tip do not put phantom power on which I'll do right now so you can at least see the the light so it comes on right there do not turn that on and then plug in your microphones that is a newbie mistake and you can't you can damage your microphones the same goes for disconnecting your microphones also phantom power don't use it for rhythm ribbon mics and this is how to properly do it to turn off your mixer you ready actually this is how you do it first you turn off your speakers if your speakers aren't off do not turn your mixer off again I made that mistake my first time doing live sound I turned off the mixer and all I heard was a big old pop and then a bunch of 60 Hertz hum it was lovely everybody looked towards my position and I was embarrassed so you don't ever want to turn your board off if your speakers are still on now if you have phantom power turn phantom power off I just hit the switch you see that the lights still glowing and that'll glow for around 20 to 30 seconds you see its slowly fading down and you want to wait about 30 seconds before you disconnect any of your microphones that have phantom power so before you do that you want to and this is something to get into the habit for turn all your trim your gain down like that you want to put all your EQ s at the 12 o'clock 12 o'clock position so we're resetting the board we're normalizing the board some people call it normalizing and the last thing obviously we put our faders all the way down put the faders all the way down put the volume on the control room and the headphones down then at that point you can either disconnect the microphones now which I normally do after you disconnect the microphones you can either connect them from here or disconnect them from the microphone itself like so but that's only after you put the gain down and the faders down I don't know how much of a difference that particularly makes but I just feel better having my preamp down before I disconnect anything and then after you disconnect it again either either at this point or at the point of the microphone you can finally turn off your power to the mixer again after the speakers are off and you can wrap it up for the night some people like to leave their boards on all the time I think that's idiotic I think you know running electric even through solid state gear just is a bad idea and also you leave yourself open for a fire it's not a hundred percent guarantee but you know I don't like leaving things that have electric running on you know it you know you can leave it plugged in with the power off but just you know this thing heats up this area right here gets quite hot after a while again I don't know if that would ever catch on fire or not so I just like to turn stuff off it also stays electric I hope you guys learn something if you have any questions for me I will be open to answering them either in the comment section or in a real home recording mailbag video I'm sure I miss something and uh yep see you next videos has been Adam for real home recording calm