
Video Gallery
The Video Gallery of Video Control Surfaces is appended below:
1. Video Editing Control Surfaces I Have Been Testing – Stream Deck XL, LoupeDeck+, ShuttleXpress
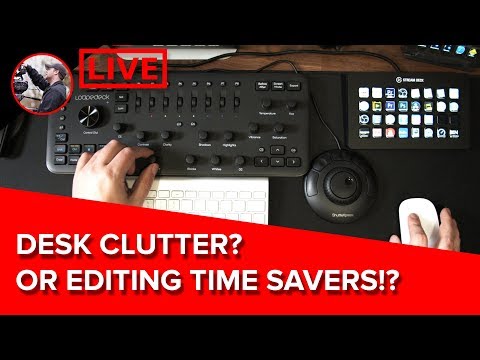
[Music] all right hello hello guys it's Bart Johnson Here I am back again I know we took last week off but it is once again Saturday 1:00 p.m. Eastern Time and it is time for me to hang out live with you guys here on the channel if it is your first time here welcome we're gonna have a really good time today I'm glad you found the channel and hope you enjoy the show today and if like I said if you're you're brand new and you like this make sure to hit subscribe down there and click that bell so you can join us every time we go live and every time I have videos come out for those of you who may be joining us who are already subscribers to the channel good to see you guys again really glad to be back I was in San Francisco last week working so we didn't get to do a show but I promised you we would be back this week and here we are we are up in my edit suite studio today because we're gonna be talking about some editing control surfaces that I've been trying out and seeing if they speed up your workflow or if they're just sort of desktop clutter because I do have a lot here on my desk and we'll take a look at that in a second but before we get started the beauty of this show is that it is live ladies and gentleman and so we are going to be able to chat and hang out and ask questions and talk and all of that throughout this entire show and of course I can pull that up onto the screen right here we already have somebody in here Georgio Alberti says hi hello to you so follow Georgio's example there guys and if you have any questions or comments or just want to say hey throughout the show this is the place to do it a few notes before we get started here it has been a while since I've really streamed from the office and I kind of had to do some special rigging for today's show I had a few technical glitches but I think I've got them worked out not super happy with my exposure on this a camera but I had to get a little creative with the lighting in here today because I've got a second camera angle for us so that we can see what I'm working with on my desk so if the exposure is an awesome please forgive me I have the camera on auto-exposure so hopefully it's gonna try and keep up and I did have to open these windows to get a little bit of fill but anyway that's the cinematographer in me bill pan is here saying hello Bart hello to you bill alright guys we got a lot to cover today because we got three things I don't know what the heck I'm thinking trying to shove three things into one show but yeah we've got three things here and we're gonna try and take a look at all of them now these won't be super in-depth reviews I'm just gonna show you guys what I've got basic functionality and all of that I plan on doing full reviews of each of these things in separate videos in the future so those will be coming soon and if you're watching this in the future and this is already gone there should be links in the description down below to those videos but anyway let's take a quick look hello Simon I see you in here good to see ya let's take a quick look at our overhead and see what we're looking at today so here we go guys these are the three devices that I wanted to take a look at today with you we have the loop deck plus right here we have the brand-new Elgato stream deck XL right here and we have this guy's old-school but I just you know it's new to me this is the contour shuttle Express so each of these are a what you call an editing control surface and they each have a different sort of function and operate in a different way and I've been sort of customizing them and testing them in my workflow to see if they are for me some I like somebody not sure yet but we're going to take a look at all of that today so all three of these like I said are what you call editing control surfaces so there's a lot of ways to interact with your video editing software of course you can just do the old old mouse to move around but what happens is when you're doing a lot of editing or you do it for a living you need to be quick you're looking for ways to be more efficient get things done faster and so sometimes moving that mouse around you know even the second of like moving the mouse over to drag and grab something and drag it down to your timeline that's wasted seconds that can really add up if you end up doing that hundreds or thousands of times per day so you want to try and streamline it so the way that a lot of people do that is hotkeys hotkeys are built into editing software and they're literally just keystrokes on your keyboard that are shortcuts to perform certain actions in certain commands in Adobe Premiere which I'll be using today there's lots of customization for hotkeys which will come in handy for one of these devices and yeah so hotkeys are the other way to do it but you're still relying on your mouse and your keyboard and I wanted to see if there are ways that I can go a little bit faster and so I picked up these three devices and we're gonna take a look at them today so without further ado let's go ahead and take a look at our first one here and we're gonna start with Oh what do we got here bill says I was researching a couple weeks ago and saw all three of these together they should be a great combo well we're gonna find that out today cuz I have been trying them out and that's why I picked them up to see if they work well together so here we go I've got a few things going on here guys well first let me just show you let's do this one first okay so what I've got here is I am working on a 27-inch iMac okay so I am on Mac OS on the latest version I'm working in Adobe Premiere that's my editor of choice that's an argument for another day you know Final Cut vs premier but I I like premiere my machines a little bit older so I've been having some issues with just some quirky stuff with Premiere Pro 2019 so I'm working in 2018 but I did use each of these devices in 2019 as well and they do work just wanted to put that out there so on Mac working in Premiere these devices work they actually all have pretty versatile connectivity I believe all three of them are matte and PC so you should be good on that platform a few of them are Linux but I don't know how many of you guys are actually Linux out there but anyway we're gonna take a look at this first one here which is the loop deck actually let me go to the loop deck solo first let me introduce all these guys I'm too antsy I'm all over the place so this is the loop deck and specifically this is their second model which is called the loop deck plus so this was originally designed to be and still is an interface for controlling mostly Adobe Lightroom so it has all of these controls that are kind of specific to Adobe Lightroom so if you're a photo editor as well you are probably absolutely going to love this thing now while you can customize a lot of these buttons and it does have functionality now a specific profile set that it comes with for Premiere Pro I've been finding that the majority of these buttons and stuff I'm not actually using at least right now until I explode this a little bit more maybe figure out how I want to customize it so for me this one's kind of a lot of wasted commands because I don't do a lot of photo editing especially because this guy comes in at 249 dollars so that's quite a bit but why did I pick this up well I do my color grading in Premiere as well so I use luma tree color and they have those sliders so if we go let's go to our loop deck here so you can see so let's go to let's go to color hopefully my machine can keep up okay so if we go into a basic correction in color you see we've got these sliders here so we've got them and you can grab with your mouse and drag and change your color so cool it down warm it up you've got tint exposure contrast highlights shadows whites black and saturation very cool right well if you take a look we actually have those individual dials here on the loop deck and they do work with Adobe Premiere so if I wanted to adjust this shot that I have right here that I'm working on this is my latest review which is out on my channel guys I just figured it was a good example to pull up of a ready to go premiere project but let's say I want to adjust the exposure on that so I can use my exposure knob here just a little plastic knob and I can go and it is going by point one increments if you guys look up here this slider is indeed moving for exposure and it's going in point one increments so I have really granular control or I can go super fast I can bring you back down or I can click and it will reset it back to where it goes and so that's how actually all of these work a we got somebody here from Scotland that's awesome international audience welcome welcome but yeah so let's see you know we can do the shadow say I want to darken those shadows up a little bit there okay say I want to play with my highlights okay I've got my highlights right here can mess with those let's add some contrast to it let's really punch this sucker up so there we go let's increase the whites let's drop the blacks so you can see I'm doing all sorts of things and then alright I don't like that adjustment to the whites I don't like what I did in the blacks undo the contrast stop messing with the highlights and shadows and then you know let's give it some saturation let's really make it really uh really punchy and vibrant there again temperature control tint control like Incredible Hulk if he had wireless video and reset back to where it goes so that is just in a nutshell the loop deck so what I am really using it for right now if we go to let me go to the solo of it so really right now I'm mainly just using it for these knobs right here now obviously there's tons of other functions in here and actually this is pretty cool I'll show you in a second I haven't used this area as much but this also does with the built in profile work with Adobe Premiere so let's take a look at that real quick so let's go to our color wheels here so here we have our color wheels in lumetri we have the shadows mid-tones and highlights well here on the loupe deck we have three buttons hue saturation and luminance and right now the little light next to Hugh is is lit and then you have these little rollers next to it now what happens is hue saturation and luminance actually ends up translating to highlights mid-tones and shadows and then these rockers control X Y and what they're calling z-axis so let's take a peek at that real quick so I'll go to you know iTap hue the light is already on so I think that's the highlights I'm still learning these that's the trickiest part is remembering everything because obviously in Premiere these these printed labels that are on here the things that are on the buttons don't directly translate over so I might print my own little label maker stickers and put them on there if I want to remember stuff because I don't have the muscle memory quite yet but here we go enough talk I'm gonna move this okay so this first one is our we're gonna side to side on that axis and we're effecting just the highlights if you look over here at the highlights so we're moving side to side and then this will adjust us up and down in that wheel and then this one what they call the x-axis is sort of the intensity one so this slide are along the side here is going or truly is that truly is the the luminance or brightness of them so there we go and of course each one of them clicks as well click click everything's back to normal go and click what's called the saturation button which should correlate to our mid-tones here and there we go we have the same functionality now obviously a track like you find on some of the Blackmagic products would be probably better for this but you know because you could just roll around this wheel but this is okay I'm not sure if I'm gonna use this as much but it is there it is the functionality again and this would be your shadows messing with your killers they're reset it so those three right there so these have functionality in Premiere these have functionality in Premiere the other things also do as well but not functionality that I'm really using at this time but that doesn't mean that you can't make this more your own what I'm gonna do is I'm gonna pull up our loop deck software actually and show you guys a little bit of that I saw we had a question in here from fer works letter we got here do you have to have a loo metric panel open to use the color grading knobs or will it automatically throw a luma tree effect on the selected clip when you start adjusting that is a great question let's go take a look at that because I did want to mention that so what he is asking oops spoiler there's the software let's get this open so what he's asking is obviously right now I am in the color tab so I've gone into color usually you have to click go into color and this is where you make your color adjustments he's asking what if you're not in the color tab does it work so let's go to just my editing my timeline window here so I know you guys can't really see let me give you the this so I'm right here I'm just in my timeline my clip is selected in my timeline so it's the background image of this that I'm going to be working on but let's go back to the loop deck I know I've built a ton of suspense here but the answer to your question is yes you do not have to go into the color tab to make your tweaks you do not have to be in lumetri so you can go through an entire timeline like I have up here you can go through your entire timeline without any to open the color tab and you can go clip by clip and make really quick simple adjustments if you wanted to do like a quick run-through pass and just balance each clip and everything you can go through and do that very quickly this device is very very good for that and that is kind of how I've been using it I haven't been doing super detailed like I haven't done anything like narrative work yet where I've really been putting this to the test for finessing my color I've done some corporate stuff where we're kind of cranking them out quickly but we've still sort of shot in a log profile and we'll throw a base slot on there but then I can go through clip by clip without leaving my Timeline view here make my tweaks and everything's great and just walk through so I'm going to put everything back I'm muck that color all up there there we go but yeah so change that scrub through so there we go so the answer is yes fur works it will work even without going into the killer tab and that is an awesome awesome feature of it I really really like that let's see here want to be films is asking to follow up at fur works does it work if the luma tree effect has not yet been applied in other words yeah I know what you're saying here so he's saying I've already applied a llama tree effect to this so let's take a let's take one that doesn't most of these have already because I apply it to the master so I'm gonna find a clip here that hasn't been graded okay let's find out that's a good question that's why I love having you guys here with me live so here's a clip because you guys think of things that I I haven't yet so that's a good question so here we go we've got this clip right here if we look at our effect controls there is no lumetri effect applied to this yet the question is can I adjust this clip will it apply elementary effect let's see yes it will look at that I adjusted the exposure and immediately it added the lumetri effect right here and I'm doing it so I don't even have to go and apply elementary effect I don't have to touch the color tab at all to do color work to this guy so let's bring that up I mean if you wanted to apply a lot you would have to go in there I don't have any shortcuts yet for that but that is pretty cool you can do your color work let's let's give it some contrast here get it looking give it looking decent that tint looks a little let's get there let's cool it down just a touch and there you go a couple seconds got it looking pretty good so I just took it from that to that just with a few moves of the dial so that is really cool and that is part of why I picked this thing up actually it's probably 99% of why I picked this guy up so like I said boom man having the window open really makes it hard to see the chat doesn't it Yee sorry about that guys usually I have the blackout curtain pulled and the chat shows up really well but like I said I needed the light today yeah sorry about that there's not much I can do about it today mmm actually let me see a little bit so there we go I didn't have my chat background layer on that'll help a little bit now we can see okay sorry about that guys but that was a great question yeah for which says I think a lot more people will get these if they realize that and then want to be films the same could you then build shortcuts to apply lots yes you can I have not done it yet but I mean we are with these devices we are diving into a realm of nerdy video editing program programming and stuff that I'm very excited about but let's let's take a peek real quick I did want to show you guys the software for this sooo we're gonna go to here so here you go guys this is the loop deck plus software so you just boot this up and say you want to do a configuration and it has all your buttons all your groups and what they do if you look here these are all the applications it has pre-built button sets for After Effects audition Aurora HDR HDR capture 1 Final Cut Pro Lightroom classic Photoshop and Premiere so it they have built-in profiles to work with each of those but all of these buttons are customizable if you click a button look at all of these different settings so color adjustments is what it's doing you can change you can click on any of these things and then go into any of these folders of controls and and set what you want it to do now this customization software I really don't think is the most intuitive thing I have ever seen like I'm still trying to figure out like okay like do they have Lee what is the order of operations here like there's so much going on I love that there's a ton of options but it's almost too many options for me to get through I just don't think the graphic interface here is laid out very well and it's kind of intimidating to the point where I haven't even touched it yet I've just been using the default profile but I mean you'll be able to program you'll be able to program buttons to you know all of these all of these all of the every single button can pretty much be customized and you can make it do whatever you want you know you'll have to sort of find a way for you to remember which button does what because obviously the the labels will change depending if you change their functionality but yeah there's a ton that you can do and you can customize it I just haven't dived too deep into that yet we I've really just been using it with that default profile but there is the possibility to expand you are asking about building shortcuts to apply lutz i believe you can do that you can set it you can set one of your function buttons to apply a look or a preset in in lightroom or believe you can get it to do a lot as well in in Premiere haven't done it yet so I don't know the process for doing that but yeah it is I believe possible and if it's not possible with the loop deck I know it is possible with one of the other devices the elgato that we're going to work in today because that thing can pretty much do anything that you can program which is awesome where do I want to go I want to go to the IMAX screen here so we just took a look at the software so that's that's the loop deck software the amazing thing is that there's also a function button here so if you change it oops I hit the function button let me see - let me go - that's okay no set of functions there let's go to these okay see you says the function so function if you hit that button let me show you guys real quick sorry I'm all over the place this right here if you hit this it literally opens up a completely different layer of controls for each of these buttons so they have dual functionality it's just like holding shift or something you know you hit this and now if we go and take a look at this now we have a completely separate set that we can do and so you can set two two commands two functions two actions - every single button and dial on this thing but that's a that super in-depth I have not dug that deep into it I'm pretty happy with just using it a color tweaking panel and I haven't gotten into the insanity of it but the rabbit hole goes very deep with this thing and you guys could get in there and really really customize it for however you would like let's take a peek at our chat real quick well drink my iced tea here a lot of talking guys me out ah Chris is saying I just tuned in so maybe I miss it but how much Mouse used to something like this loop deck eliminate actually it eliminates quite a lot I now do not even touch the mouse for doing any color work and usually I'm I'm working with I'm working with our color sliders here so usually I'm pulling these sliders back and forth and oh I went a little too far I went a little bit and then I get frustrated and I end up just punching in the the exact total that I think I want right here this thing now what was I just doing the temperature this signal temperature do granular control right here I don't touch my mouse at all while doing color work now because of the loop deck oops I wasn't showing the loop deck itself so here yeah temperature so it cuts out quite a bit which is awesome because I hate using those teeny tiny sliders there and trying to control it with your mouse I don't like it is it beneficial beyond color work so I specifically got this for color work and it is kind of tuned to color work you know with all of the obviously color specific commands there are a lot of other commands on it here that I am not using that you could program to do other things in editing so you could program and like this would be a cut this would be like ripple to Lee you can change that this says export I'm sure you could probably actually program it to export from premiere so yeah there's other functionality you could do beyond color but this thing is really suited for color geared towards color and I've been using it for color cuz I have some other things to help more with my editing and we're gonna get to that in a sec let me go tear through our chat real quick for words saying I've considered trying to get my MP K 49 keyboard working as an edit surface for now I've just moved two programmable mm Oh mouse and that's helped a lot does anybody out there know what fur works just said because I don't I'm not that techy at least when it comes to customizing computer parts and and and functionality and that kind of stuff I'm getting to it but part of the allure of the loop deck and these other devices is that their software is really is really setup maybe not the loop deck so much it's not quite as intuitive it's a little overwhelming but they make it as easy as possible for you to program in your own commands and shortcuts without knowing code without having to mess with actual programming when I say programming I mean I'm like picking from a drop-down list of what I want but anyway we got to keep on trucking along here because we got two more but that my friends is the loop deck no I gave it away that my friends is the loop deck plus here it is two hundred and fifty dollars I think that's a little expensive to be honest I think it's more of like a hundred and fifty dollar product and I am kind of only using a fraction of its functionality but who knows as I get into the future a little bit more I may get a little bit more familiarized with this device and some of the other things it can do because I'm I'm really using only like what is that a third of of its functionality but yeah very cool let's move on to another device we're gonna take a look at another one that is brand new to me and has actually been pretty cool so let's go to the shuttle Express and I'm sorry if this shot is a little bit fuzzy guys I am using one overhead shot and cropping into it heavily to get us shots of all of these devices but here we have let's say I'm just moving some stuff around here but here we have the shuttle Express so this is from a company called contour again guys there will be links down in the description below for all of these if you're interested in checking them out this guy was only 60 bucks on Amazon and it's simple functionality it has a little dial here it has a spring-loaded little rotation dial here and then it has five buttons and everything is of course programmable but I have only reprogrammed the buttons to do certain things that I like because this works as a jog and shuttle in premiere and I absolutely love it so let me show you what I'm talking about when we talk about that so let's go to our shuttle Express overview here so here we go guys we're back in that timeline and I'm just go to this so what we're gonna do here is I'm gonna show you guys how I sort of use this we're gonna work in this clip right here so here is the shuttle and the shuttle lets me go through footage and it does react and speed up and slow down based on how far I'm pushing this and this is spring-loaded this outer ring here it's rubberized so it's very easy to grip but the farther you push the faster it scrubs through okay and when I let go it springs back to its position and it's good to go freaking awesome now say you want a little bit more granular control like Oh frame by frame all right here's your little jog dial it is clicked I don't know if you guys can hear that but I'm able to go through frame by frame find where I want okay let's let's say I like I like from right here I have programmed this button mark an in-point let's go let's scrub to the end of this slider move okay let's back up a little I started twitching and where does that okay so it goes right there all right mark my out point boom now I have marked a clip right here without touching a mouse or touching any keystrokes that is freaking awesome so that's just using my source and picking out the part of this clip that I want to bring into my timeline but let's go into my timeline here and let's see so I'm gonna scrub through be like oh I'm not gonna make actual edits here but let me show you guys okay and I want to I want to cut this guy right here let me get my granular control let's go to right there I've programmed this middle button to just be a simple cut there it goes made a cut and then I could delete this part however the easier way to do it is I have also programmed these two buttons to be ripple delete back and ripple delete forward so I want to delete everything before this cut point and bring my whole sequence my whole timeline close up the gap so I don't have a gap there I just tap this button here oops I think I inserted the clip I was wrong see I'm still customizing these guys so yeah bear with me live shows gotta love it I thought I've reprogrammed that guy I guess oh I know what I did I programmed this guy so that I can quickly insert these into here so I did my in and out points right here in and out and then if I just clicked that it would immediately dump this selection into my timeline right where I put it I think this one is ripple delete so if I yeah there it goes so this is ripple delete back so I wanted to cut off so like I'm talking here say I want to get rid of the the first part oh I'm like I'm not even I'm covering the whole thing you guys guys tell me these things all right say I want to get rid of like this portion of this clip right here I'll just click this cuts it out trims the whole thing up all right I don't like this section right here so I'm gonna make a cut here I'm gonna two pairs and go frame-by-frame to here and ripple delete that out and it closes everything up boom nice and simple ma'am it is so simple and the funny thing about this is that this thing is old-school it's back to when we used to have devices that had tons of like shuttle and jog wheels all over it and now we're like oh no we're advanced and touch screens and what's up now but no going back to the basics of this thing is absolutely awesome this has been for 60 bucks a fantastic device and I've really been been working on programming it it fits nicely in my hand just been figuring out let me go to the the solo of it again and just been really figuring out the best way that I want to use it you guys saw I've been playing with the functionality of some of the buttons but scrub scrub scrub in point out point dump it in like done really cool really simple it's very lightweight this is you know it's plastic and whatnot only five buttons but they do make a version of this called the shuttle Pro v2 that is out there I have a link to that down in the description below as well I believe it's a larger panel same idea still has the jog wheel and the shuttle and all that but it's got something like 15 buttons and it's about a hundred bucks I believe and I thought about checking that one out but I didn't feel like I would need all of those buttons especially because I have other control surfaces and so I wanted the smaller form factor of this one and I like this guy it does stay on the desk pretty good it's got rubberized pads underneath but I did actually make a little butterfly of gaff tape and put it under here just so I can really kind of be rough with it and it's it's not moving around or anything like that so nice and simple sits right there and yeah USB connector cable just like like all these devices we're gonna be taking a look at today it is a permanently attached cable but it had enough length for me to run it and all of that but that's probably for more of an in-depth review kind of thing but I just thought I wouldn't notice take a peek at the chat real quick because really I don't have much to say about the shuttle Express except that I really like it it is awesome so I am training myself because that's the hardest part about using new devices I'm training myself to have the muscle memory to instead of going to my keyboard instead of going to my mouse to use this thing and to use the other things on here and I've been doing that slowly and it's working really well but I find this one to be super intuitive and I can just interact with my footage fly through it make an assembly cut in freakin no time and it's just great so let's see what we got here so wannabe films are saying I'm curious which would be more beneficial the loop deck or something like a tangent design control surface so he's talking about the the tangent ripple it is a control surface that has like three balls on it I thought about that one I seemed I think it seemed a little large and a little expensive and so I didn't pick it up and I had always been really interested in the loop deck so who knows maybe I'll take a look at the at the tangent ripple if you guys are interested that's another old-school one it's been around for years but something that's been around for years means it's pretty tried and true to do Bill pantsing for anyone that doesn't want an MMO Mouse so making recommendations in there good glad you guys are helping each other out in the chat the good old days if it only made the noise of a database a deck spinning through a tape yeah no no artificial noise on the on the the shuttle Express but it is pretty cool and and like I said guys my favorite thing about it is that this is clicked so frame frame frame frame it is clicked that's awesome and the fact that this is rubberized easy to grip and is spring-loaded and goes back is just absolutely awesome so it does have hard stops at the ends too so when you get to full speed and whatnot but yeah freakin cool little thing for 60 bucks I'm really really happy with this guy all right so without further ado I think we're gonna move on to our last one because this one is probably the most versatile product I have seen in a very long time not just for video editing but for interacting with your computer in all sorts of programs and and everything and that's going to be the the Elgato stream deck sorry I was just looking I was like oh the mailman's here I bet you he brought me some stuff today so for those of you who have seen the live shows before I do a lot of my switching on an elgato stream deck and let's just dive into it I'm I'm all over the place so let's go to the elgato stream deck again we are super punched in and I only have one overhead camera angle so trying to get the exposure for these icons and everything else was kind of impossible so I'm sorry this shot looks like looks like poo but it'll at least show you what we got so the stream deck I have a smaller one up here which is 15 keys and I've been using it for a long while but this is the new stream deck XL which has 32 freaking keys so what it is is it's just a control surface with these buttons and it has these little LCDs behind them and you can customize put your own icons in there and customize the functionality of what they can do and the stream deck is super super versatile you can use it to open websites you can use it to open specific programs you can make folders of stuffs I have a folder with my own most useful youtube thing so I can go straight to my live events page I can go straight to your guys community comment so I've got folders of that I can launch premier I can launch Photoshop edit ready OBS it can do OBS controls because that's what I'm using my other one which is off camera right for you or right now for I use that to switch between my different displays and it works amazingly it makes it so easy for me to be a one-man band and switch but where this guy really shines is when we get to editing with it okay so I've created a profile in here and I'll talk a little bit more about that later but for Adobe Premiere and Premiere Pro Tools so I haven't so even though it's open I haven't selected premiere yet but watch when I'm in Premiere it should change over boom instantly so it instantly knows that I am using Premiere Pro right now and so it brings up the profile that I have built for my premiere controls and as you can see here I have created custom icons and functions for my most commonly used functions that I use in Premiere and also some buttons for my workspaces so there's so much functionality I'll show you guys some of the software but basically what you need to know is this thing can do hotkeys it can do multiple commands at once there's a basically limitless amount of stuff that you can do with this demascus diary hey just dropping by to say hello got to do some stuff but it's good to have you back it's good to be back thanks so much for popping in and saying hey no worries that you got to run just make sure you check out that replay and look for the full videos on these things coming soon cuz I could talk about these things forever but not today let's see here bill saying could you quickly show how to assign these shortcuts also how many profiles and pages can you create I will get to that in just a sec let me just show you a few things on this and then I'll show you guys the software because it is freaking cool all right so here I am one of the things I use the most is like you have my tabs up here so let's say I want to go to now I know I'm using my mouse see I got it I got to get used to scrubbing but say I want to work on this this is a mo Gert file that I used for the title say I want to get in there the way you guys do that is you go up to graphics and then you can edit it but I have built into the stream deck right here click and it should take me boom to my graphics panel my computer's trying to catch up because I'm making it do a quadrillion things right now so I'm getting the spinny beach ball but come on baby you can do it I think it's time for a Mac Pro what do you guys think yeah anyway you can take my word for it eventually when she stops chugging it will go to the graphics panel and there it is and now I am able to edit my graphics now I told you guys that I don't really use my color panel very much anymore but I've built one for color so if I hit here it'll take me to the color window I think some of these may have unlinked well this is embarrassing let's see if audio works now I think it's just being a pain in the butt but anyway they can't be programmed that way take me back to editing no you don't wanna play alright fine but anyway you can do that right there I've also programmed like import so I'm in here say I want to import some footage I just hit this button and it brings up my import screen and I can bring some stuff in all right I'm over here and I need to create a new sequence okay let me just hit my new sequence button boom that's up one of the things that I use very very often is interpret footage so okay I have this clip I hit my interpret footage now I can change my frame rates all of that let's see here I want to scale something I've got something for scaling that new titles frames I've got audio controls for synchronizing the mixer render all I've got something to set up the side-by-side view I think I have to be on this but if I go to the side-by-side view now I've got my comparison view mode and I can toggle that sucker off down here my time line okay I want to be able to view everything so I've got one right here tap now I can view my entire time line I want to punch in a little bit punch punch punch punch punch got that no worries right there I want to view this window full screen right now I've got a full screen brings that up takes me back awesome right these are just the sets of ones that I have put together but yeah so these are the ones that I have put together these are the ones that I find the most functionality I've got scaling I've got cuts I've got nesting I've got apply auto dissolves I got apply crossfades for audio I absolutely freakin love this but you guys were asking Bill was asking if I could take a look at who did my camera up here freeze awesome this is the technical issue I had earlier guys so you can still hear me yes but I don't think you can see me but anyway I'm gonna go and yeah I'm frozen in the corner look at that let me see if I can give me a sec guys camera and it to do I'm asking a lot of this computer right now so you know don't Jack it up don't Jack it up bear with me guys damn we may have lost that let's go to FaceTime HD there we go so you guys will have to just take this angle right let's see you see me oh now I'm teeny-tiny whatever well uh what we'll make it we'll make it work here guys so sorry about that technical issues running so many different devices running two cameras via stream decks into everything so it just it just tapped out on me but that's okay we're gonna carry on we're just gonna use the the FaceTime camera sorry it's not like super framed awesome right now or anything like that loop deck we don't need you anymore we want to take a look at stream deck so I have to stream decks connected but we're gonna go into the stream deck software boom here is the stream deck software and as I said you can control both of your devices here so I have one that I've just called stream deck which is my small 15 key one so here you can see the keys that I'm using to control my to control my broadcast here and then if we go to sorry my excel here's my my bigger one let's make this larger so you guys can actually see so there we go so I have created all of these icons here and so these are our websites but over here on the side you can figure out everything that you want to add to it so you just drag and drop things to this to add a button so you can have actual control centers for for Elgato but i don't use that very much OBS controls so you can switch scenes you can control your mixer you can start record you can start your stream you can select a source input so all of those you can switch actual stream deck controls this is where you could create folders like I've got two folders in here with different commands so if I double click you can or there we go come on there we go so my double click into that folder you can see I've got all my YouTube controls and icons in here open this up let's see website hot key switches hot keys which is what I use mostly in Premiere open meaning you can open different programs just by hitting the buttons so these just automatically open some of my most commonly used programs texts you can have a type text Twitter you can have it send out tweets YouTube you can have it do chat messages or it can show you how many live viewers you have and all of that kind of stuff in there so that's actually really freaking cool and there's so much more you can do so if you go into more actions I've turned off a lot of the ones that I don't use very much you're gonna have it show you a clock you can put games on it you can have a control Phillips hue there's just Apple Mail you can open up tells you how many emails you have a crazy amount of stuff that you can do with this but if we go into my premier tools this is a profile so go into premier so these are all the premier sequence or premier things that I have created to run everything created my own little icons so what you do that is you go in this is a hotkey so I just tell it what I want the hotkey to do so this is shift s for scaling in premiere put my title on it there so I could you know type whatever you want but it shows up directly on the button and then you add that button to the stream deck and it's good to go so what I did was in Premiere I either took all of the shortcuts or I or I created new shortcuts if they didn't exist because you can do that in in your software in Premiere told it new hotkeys for some of the commands that that I like like this render all is one of my favorites I set it to shift return to render you know pre-render my whole timeline so I just programmed that in shift return render all and now anytime I hit that button on the stream it does my custom command in premiere these which were being a pain in the butt but should take us to the different workspaces in Premiere and all of that so somebody was asking about how many profiles and and folders you can create and how deep you can get and I believe it is actually at least four folders I think it's unlimited because you can nest a folder inside a folder inside a folder and for profiles I think it I I'm not sure that there's a limit on that either I'd have to I'd have to look that up but you can create as pretty much as many as you want man it's crazy hmm all right sorry I just took a little sip there let's check our chat and let's see how bad my dang man make this bigger all right all right let's take a look at our chat so now I'm looking the opposite direction and whatever that whatever technical difficulties happened guys right so our chat is saying quick can you quickly show how to assign these shortcuts also how many per okay so we did that one Trevor says thought I missed the whole thing doing a marathon show no we always go for about an hour so we are closing in on that mark very quickly right now [Music] Trevor saying it's a pretty slick-looking panel builds audio is good that's when it froze at least you didn't freeze with your eyes half shut yeah it wasn't a bad it wasn't a bad freeze frame for me you know I wasn't stuck like or something like that so that was good good question Peter G the creative how much is each product so the loop deck the loop deck plus is two hundred and forty nine dollars the stream deck Excel is two hundred and forty nine dollars as well there are two other smaller stream decks there's the one the original stream deck that has 15 keys and they even made one called the stream deck mini that only has six keys and I'm not sure the pricing on those they are cheaper but there are links down in the description I think I think the regular stream deck is like a hundred and fifty bucks and I think the mini is maybe like ninety bucks but there are links down below if you want to go check those out and the shuttle Express here is is sixty bucks on Amazon link in the description down below as well so you guys can check all of that out let's go back to our chat here and let me show you guys real quick so I want to show you the full overhead so you can see here how I have all these things laid out but here is my smaller stream deck that I'm using to control the actual stream because I needed to I needed to have my premiere controls up here but still control OBS so I have I have to so you can use and manage two at the same time pretty cool and then let's go back to our chat here and get caught up um let's see here do douche is nuts is here wait what is this really Bart live streaming my goodness hey man I've come back we had a show two weeks ago I only took one off and then yeah granted I was gone for like a month and a half before that but you know NAB work all that stuff it happens man but yeah I'm back it's good to see you too Susan says I don't do Mac I'm camp Asus Zenbook windows all the way so I believe all of these devices also work on Windows and some actually on Linux as well so you don't have to be on Mac to use these so they are versatile cross-platform that's so there you go you should be able to use them bill says you shouldn't have shown us the stream deck now I want one yeah I am addicted to the the stream deck it is absolutely awesome and I've been using the 15 key one for quite a while and now that they came out with the the bigboy the 32 key in the excel I had to have it and yeah I have so much more plan that I want to be able to do with that stream deck the excel and it's just freaking cool that's where you can start programming and stuff to apply Lutz and apply effects and all sorts of stuff you know like the the sky is the limit really for what you can do and what you can figure out because you can have it also do a series of commands with a single book single push so if you I saw an example of someone who works in Photoshop and they make they make like icons and stuff and so when they need it to export an icon they needed one at like a 100 by 100 they needed one that's like 25 by 25 and they needed one that was like even smaller or whatever and so what she did was she programmed all of the hotkey strokes in order to you know command S Save or scale and change and like then enter text for in the resolution for like a hundred pixels by a hundred pixels and all that stuff and did it for all three of them in a single chain command and so she had one button that would then resize and export all three of her formats with a single button freaking sweet man so stuff like that I haven't really dived into yet I'm still using it as basically a visual hotkey kind of solution let me show you guys it again on its solo so I'm really using it as mostly just already hotkeys that of course you could do on a regular keyboard but the difference is that here I have this nice graphical interface that is showing me you know so I know I'm not trying to remember okay is it shift whatever instead of holding like shift command something I just tap a single button and it does what I want and I have images here that show me which one is which so that's kind of nice alright take me back to chat there we go so we're gonna get wrapping this this up here guys but I do want to answer all your your questions here I would love to go really really further in-depth on all three of these which is why I'm going to be releasing three videos hopefully very soon one for each of these products a little bit more in depth giving them a little bit more of a focus and so that if if you want to just learn about one and a little bit more detail you don't have to watch this whole show again and learn about all three you can just go straight to that so I'm gonna work on that because there I think there's a lot of capabilities to all three of these and they each perform a very separate action that I've been pretty happy with them need some t-man an hour of talking really get you alright let's see what we've got it's just not this thing wasn't that thing on Kickstarter I'm not sure which thing you are referring to I think the original loop deck may have started as a Kickstarter but the loop deck plus all of these are available on Amazon so links down below I don't believe the elgato stream decks were ever a Kickstarter thing but I think the original loop deck was and this is the loop deck Plus which is the newer generation she's out there saying thoughts on black magic panels so as you guys know Blackmagic Design makes a lot of interface panels they're also coming out with a new editors keyboard and to be honest when I saw that editors keyboard at NAB it kinda is what inspired me to start looking at these solutions because there's is like $1,000 for the keyboard and yes it has like a jog wheel control and all that kind of stuff into it but I was like you know what I bet you I could piecemeal this together and get the functionality that I want without spending $1,000 for one of their things and so far I'm pretty happy with this I mean yeah I've got a lot on my on my desk here but I still have plenty of space you know I'm not I'm not cluttered and everything is within arm's reach so when I'm editing I'm now usually working like this my mouse is just over here in case I need it for something but you know I've got I can do some keystroke commands and typing if I want to I can shuttle and jog through everything cut and insert clips here I can do my color work right here and I can do all of my premiere system commands and stuff that I need all the time right here so I'm moving this hand really doesn't even have to move but maybe an inch or two and this one it's easy enough to just boom boom and then I'm back to working through my footage so I've been pretty happy with them let's get back here to the chat and we are gonna wrap this up guys because we are at about two o'clock and we've been hanging out for a while she's that says yeah I checked the loop deck was on IndieGoGo okay also remember seeing an editors keyboard so he's got a link to an editors keyboard so yeah there are lots of other solutions out there to be able to pull this off the question that I was trying to figure out is are these things really helpful or are they just you know filling up my space on my desk and emptying my wallet and while I do feel that the loop deck is probably overpriced the stream deck is expensive at 250 as well but I kind of think it's worth every penny especially if you really customized that thing and if you don't need 32 freaking buttons all at once there is the more affordable of the two other models and for 60 bucks the shuttle Express is a no-brainer I really think that as I'm able to train myself mentally in my muscle memory to use these as opposed to instinctively reaching for my mouse and keyboard I think I'm gonna be very happy with my efficiency in both editing and coloring with these devices so that's awesome and she's nuts is now busting out the that's what she said joke so it's probably time to get on out of here alright guys well thank you very very much for hanging out and check I love hanging out with you guys it's it is it is tricky to continuously do the shows when it is the busy season and I do so much travel for work so I'm glad that we were able to sit down and do this today I hope this helped you guys out taking a look at these I'm going to continue testing all three of these and and really use them I do want to put the I've been not really dis gaem ER but I bought these so these weren't sent to me or anything like that I legitimately wanted to check them out and took it upon myself to scope them out so I hope the information helped you guys I hope the question-and-answer stuff really helps you guys out sorry about the the technical difficulty with my a camera feed just crapping out but I am running multiple cameras and sources and stuff into this computer over the USB bus and I'm I'm sure it's not too happy about it but it held together for a while so thank you guys for the last time here for hanging out I appreciate it if you haven't already make sure you go ahead and subscribe click that notification belt so that you will be notified whenever I go live I believe yep next week we will be taking a week off again sorry about that but I am going to be working again in Anaheim so traveling back across the country but I will see you guys the following week and you guys have a good one I'll see you then take care guys you
2. Make Video Editing Faster | Tangent Element Control Surface Panel

[Music] what's up guys all right so now you can do a room tour through your tour or whatever you call it like the workplace tour and give you guys like behind the scenes of like my setup here what I use and what my like like man cave I guess I don't know anything station what do you guys call this your your creative studio what this looks like because I've been down here like 90% of time editing my jobs editing work for other people editing my own YouTube videos I mean gaming this is everything I do is basically down here and I had like different sections down here that I actually want to show you guys and share with you but I'm gonna actually not gonna do in this video I probably do is in a different video so make sure that you subscribe so you guys don't miss that but today I want to talk about a device that I use for editing nearly every single time and I've been using this thing constantly for a while and it's controlled by control server by tangent this device works wonders if you have like heavy workloads and you need to get things done quickly now the learning curve on this can take a while because there's a lot of button placements on here and knowing that you have to learn it and learn where buttons are but what you do your work flow can speed up dramatically this device works for DaVinci Resolve it works for Premiere Pro and Final Cut Pro 10 I've used this on every single one of those programs now each program has the strings with this device the color correcting is works amazing on DaVinci Resolve and that's the through this the middle panel with three balls on it absolutely amazing so when color grading comes in color grading with this in DaVinci Resolve makes it simple Premiere Pro utilizes the part of maybe about 60 to 70 percent of the entire control surface it makes things simple and easy but the coloring doesn't work so well in Premiere Pro that I've noticed and that I've been my experience with it but the one editing software that works phenomenal with is Final Cut Pro 10 this thing can work from each step of your workflow from importing to name your in in your library to setting to Timeline to also color grading to the audio Corrections to exporting too I mean every single step in your workflow this thing masters within Final Cut and it utilizes each of the buttons so that way you can if you want to break up our clips if you want a blade cut if you want to change your event for you or add an event viewer show your scopes everything is in here I I love the little dial knob specifically to zoom in and zoom out again this is a very high price tag for some like this but once you utilize it if you can utilize it within your program like photo Cut Pro 10 or DaVinci Resolve which of those are the two best programs that I like to use with it it for me is worth it it slices things down tremendously I mean a click of a button I can use this thing really fast in the motion with it it's just I feel like a hat I feel like I'm on my mojo when I'm on this thing it adds a lot of fun to your workflow if you're professional video editor I would recommend like that especially like two color gray specifically at a certain point but the price tag is extremely high on this that's why I cannot recommend this to anybody like when I purchase $3,000 and it's just the price tag is very high it's very professional modular low it's very modular you can you can buy them as you know by the by themselves but they just have newer ones out now that I feel that may be a little better but especially for the price itself Blackmagic has one for believe a thousand dollars that I've been wanting to try but I don't bite the bullet because I got this baby and it works absolutely just fine it was something I've been wanting to show you guys for a while so I was reading on my desk I had a few questions from a few people asking me what it is or can you talk about in the video that's what all I'm doing now is kind of giving you like a reference overview of what it is and how I use it so anyways that's it guys hope you guys like this video give it a thumbs up if you did and besides that my friends I'll look at you guys in the next video [Music]
3. RIVAGE PM Training Video – Control Surfaces

This is our Audioversity series for RIVAGE PM systems, and today we are taking a closer look at the control surfaces: how they are laid out and what facilities are available. Between the PM3, 5, 7 and 10 there are obviously some differences, though the general work-flow remains the same. Let’s start with the new PM5. Take a close look at the faders, because this is where your fingers will spend most of their time. All RIVAGE consoles use 2 or 3 banks of 12 faders, plus 2 master faders. Next to each bank is a field of layer buttons. First you select which type of layer you want to access: Inputs, Outputs, DCA, or Custom. Then you select the channel numbers to see. So you have a selection of fixed layers, where you can always find the inputs and outputs in numerical order. And you have 12 custom layers per bank. Or you used to, with previous versions. Now it’s increased to 30 custom layers, where you can program any channel to appear on any fader. And the Master faders are also customizable, useful for monitor engineers who want a cue fader. Just above the layer buttons we have “Sends on Fader”, also useful for monitor engineers. Select which sends you want to see either from the screen, or by selecting a Mix or Matrix bus from another fader bank. Above the faders you see a row of encoders. On the PM7 and 10 there are two rows, so on the PM5 this row has two purposes. Press the ENCODER ASSIGN button to choose their role: either assign them to a specific function like analog gain, high-pass filter or dynamics threshold; or let them work with the screen: whichever controls you highlight on the screen will be adjusted on the encoders. And see there is also a TOUCH AND TURN encoder ready to adjust any parameter you select. Particularly useful for the plug-ins which may have a classic look, where the knobs don’t exactly align. Now, take a look here, between the fader banks, where there are 12 USER DEFINED KEYS and 4 banks. These can be customized with all kinds of features, such as Mute Groups, Scene Recall, Talkback, effect Tap-Tempo, and screen Bookmarks. I always like to have one to set phantom power: hold it down and use the channel SEL keys to switch it on or off, as you see here. Now take a look at the selected channel. On the PM7 and 10 it takes a large area, and includes almost every function, including SILK, Delay, Recall Safe, and 12 Mix Send encoders. On the PM5 there are fewer encoders, but there is an additional screen, which could be preferable to fans of touchy gestures. And each screen has a new SEND ASSIGN control, which helps to quickly set send levels and pan from the selected input to multiple outputs. Lastly, on the far right, we see controls for talkback input, monitor outputs, and the SYSTEM button is used to power off the console correctly. Then 2 USB ports are used for: stereo recording and audio playback (WAV files or mp3); and for loading and saving scene memories, libraries and complete console files. These files are fully compatible between all RIVAGE console sizes. Take a quick look under the armrest, where you can find the headphone sockets. Notice PM5 has one for each cue bus, as does PM7. The PM3 lives with just one, while the big PM10 surface has the luxury of 2 at each end, so two operators can work without having to skip over each others’ wires! Now to the rear panel, where all Rivage consoles have a similar range of connections. First the utilities: dual power supplies for redundancy, lamp sockets, fan speed switch, and a RESET button. You’ll only need that if you ever need to restart the software running the screens, without stopping the audio. Then there are MIDI and GPI connections for external control, and three USB ports, which can be used for memory drives, keyboard for typing names, and mouse for screen navigation. The CONSOLE NETWORK is used for connecting to the DSP engine, and the PC Network port is for connecting the Editor software and the StageMix iPad app. We’ll tell you how to get that connected in a later video. There are also some audio connections on the rear panel, for local equipment. Each console has 2 MY cards, which are the same slots as found on CL and QL consoles, as well as PM5D, LS9, DM1000 and so on. There are more than 30 different cards to choose from, with 4, 8, or 16 channels in and out. Then we have the 8 OMNI inputs and outputs. On PM3 and PM5 they are the same specification as Rio-D2 mic pre-amps. On PM7 and PM10 they are the hybrid mic pre-amps with SILK. Finally, some AES/EBU in and out with sample rate converters. PM5 has 4 channels in and out, while PM7 and PM10 have 8. PM3 doesn’t have any, but remember AES/EBU cards can be used in the MY slots. The next two videos will focus on the DSP engines and the I/O racks, so we’re going to find out a lot more about all the connectivity options really soon. Bye for now.
4. Yamaha RIVAGE PM10: System Overview

Hi, I am Andy Cooper. Let me tell you more about the new Yamaha RIVAGE PM10. There are three main components: the control surface, the DSP Engine, and the I/O Rack. Firstly the console: It has 3 sections of 12 faders plus 2 masters. So 38 faders totally. Each section with a number of custom layers. There are two 15-inch touch-screens and a large Selected Channel area. You can see input gain, delay, EQs, Dynamics, and Mix and Matrix Sends. Then here we have 12 User Defined keys and 4 User Defined knobs. Each of them with 4 layers. Then if you look below the nice wooden armrest, you will find 2 headphone amps for dual operation, or advanced monitoring with 2 cue buses. On the rear we see some local I/O, redundant power supplies, and the CAT5e link to the DSP Engine. The DSP Engine has a huge mixing capacity within its 5U frame, and it runs at 96kHz as standard. It can handle 144 input channels, all with A/B input select, delay, High-pass and Low-pass filters, 4 types of 4-band Parametric EQ to choose from, 2 dynamics processors, and 2 insert points for up to 8 additional plug-ins. For outputs, there are 72 Mix buses and 36 Matrix outputs, as well as 2 stereo masters. That is 112 output buses totally! Each with 4 types of 8-band PEQ, Dynamics, delay, and 2 insert points for up to 8 additional plug-ins. There is a GEQ & PEQ rack with 48 units. That means up to 96 channels of additional EQ, of course with fader control and a helpful RTA display. The huge plug-in rack can handle up to 384 separate processors. There are 45 types of effect to choose from, including reverbs from TC Electronic and several vintage EQs and compressors in collaboration with Rupert Neve Designs. These use Yamaha's Virtual Circuitry Modeling technology. And we can expect Eventide H3000 Live to join this valuable collection in the future. Built in to the DSP Engine you will notice a number of card slots. There is a new HY slot that is capable of 256 channels in and out. This is ideal for audio network interfacing. We have a new Dante HY card that can actually handle 144 channels in and out at 96kHz. We also have some standard MY-card slots, which are compatible with all the other Yamaha digital mixers from the previous ten years or so. See the fiber connection: That provides a redundant ring connection to the I/O Racks. It can carry 400 channels of 96kHz 32-bit audio. And see we have redundant power supplies. Of course, we will be able to provide a complete redundant engine for high-profile applications. The I/O Rack for RIVAGE PM10 has 6 large slots in the front, with 3 card options: 16 mic/line input card features the new hybrid mic preamp design. We will explain more about this in another video. There is a 16-channel analog line out card and a 16-channel AES/EBU in and out card with sample rate conversion. That shows we can handle 96 inputs and outputs from this area. But we additionally have 2 MY card slots on the front and 2 HY card slots on the rear. Using a Dante HY card, we could interface with a further 128 inputs, meaning one I/O Rack can handle 256 inputs and outputs totally. And remember we can have up to 8 I/O Racks in one redundant ring. That means an I/O capacity beyond the count of 2000! Notice each device has redundancy for its power supplies. Additionally all audio network connections have redundancy. We will have redundant engines, and even redundant consoles. Additionally you will be able to cascade DSP engines to double the input channel count to 288! Of course the I/O racks have a Gain Compensation system. So multiple consoles can share the mic pre-amps, while monitors and FOH can share the redundant ring. And Dante can be used to connect to a whole ecosystem of audio devices. RIVAGE PM10 is truly the new generation of networked live audio digital mixing systems.
5. Color Grade and EDIT FASTER W/ Loupedeck CT in Adobe Premiere Pro

what's up guys so today I want to show you guys a very cool product called the loop tech creative tool you may have remembered a couple months ago I did a video on the loop tech Plus which quickly became one of my favorite video editing tools so loop tech reached out and asked me if I wanted to get early access to try out the loop tech creative tool and provide feedback for them so I want to share with you some of the things I really like about this panel compared to the loop tech Plus and why it's become now my new favorite editing panel so let's go ahead and begin now you'll notice there's a big difference between this and the loop tech Plus mainly that this is a lot smaller it's about a quarter of the size but most importantly the biggest difference is that it dynamically changes depending on how you edit and let me explain further what I mean by that so for example you'll notice if I jump on to let's say Mac OS if I go into Safari automatically things change if I go into Premiere Pro this dynamically changes depending on what I'm using this also works with Adobe Audition it works with Final Cut and a slew of other applications too now what's really neat or what I really like about this is how you can customize your editing panel to really fit your workflow so for example you'll notice here right now if I push on tools this will automatically or dynamically adjust and I kind of program this the way I like to edit now you might say Armando a lot of this stuff you can kind of create shortcuts and that was kind of the feedback that I saw a lot of people saying from the other video is I have my own shortcuts and so that I say yeah you can do that but this allows you to customize it even further because they have certain api's and they work with Adobe to allow you to do even further things than just shortcuts and I'll demonstrate that a little bit later so for example you'll notice here I have these tools and these are the tools that you see here on the left hand side around in the middle here so if I want to create a text tool I can just push on text you can also swipe so this has gesture base so if I can swipe left or right so essentially what this has is different pages and you can also set up different workspaces so for example if I tap back you'll notice that I have editing color and audio once again I set this up but you can set this up however you want so if I go into color this will bring up my color tab so you'll notice that everything dynamically changes including this little center wheel which now shows shadows mid-tones and highlights and will jump into the whole color part in a second here so let me go back to the editing workspace here so right now one of the things that we often do is we use footage with different resolutions so for example we're editing 1080p footage from the USR we also work with black magic which films in 6k so we're often changing things and for example I'm going to go ahead and drop this footage here we have some 1080p slow motion I'll drop this into my timeline and here's a little footage here now normally if I want to scale this up I would have to go into scale and then go to 200% because this is 1080p footage and that's great a lot of times if it's like c200 footage we have to go to 94% if it's Blackmagic we have to remember it's like fifty six and a half percent it's just a mess I mean I kind of remember these because these are stuff that we are constantly working with but what if I could just push a button and it can automatically just scale to the appropriate size or the resolution that we are working with which is 4k well you can do that so I'll show you guys how easy it is to do that so right now I don't have it programmed because I want to demonstrate how you can do it so if I jump into the loop tech configuration tool you'll notice here on the right hand side there is the editing pages that I was referring to so I have my editing basics and tools so once again just to demonstrate that it's these right here tools and edit basics and I can also swipe but for example I don't really use ripple delete so I want to get rid of ripple delete so what I'll do is I'll grab ripple delete from here and then just drop it off to the window here and it'll delete by itself what I want to do is I want to change this to scale so I'll type in scale there and I could do scale to frame size that's exactly what I want so I'll drag that over and then BAM as soon as I jump into premiere scale to frame size which is great so now rather than going to effects trying to figure out what's the resolution it doesn't really matter because I can just push here scale to frame size boom there it goes just like that and I can apply that to all of my footage which is saves a ton of time now when I go into the color grading stuff which is my favorite I can just push on to and now it brings up my color workspace and from here I can do a lot of different things for example I can adjust color temperature similar to the loop tech plus so you'll notice here the temperature is changing now another thing that this allows you to do is remember this is like a quarter of the size you're gonna say Armando I need more of these knobs to adjust more things well no problem you can just swipe up or swipe down so remember this is temperature if I swipe if I swipe up or swipe down it changes so now this was temperature now I can change it to exposure so you'll notice like at the exposure I'm over exposing or I can under expose and it works really really well one of my other favorite things to do and this I actually programmed the head of time and this is not part of Adobe so you don't you can't really do this unless you custom program it is bypassed lumetri color effects so for example a lot of times when I do color or color grades I like to see the before and after so if I push on bypass color effects you'll notice that it goes back to the original image and I can just push that back and then it shows me my color grid which is very useful again you can create shortcuts for these but this just makes it so much easier because I have everything here laid out and it's just more comfortable to use if I go back to my editing tab if I go here and start editing you'll notice that this wheel changes and a lot of times I like to scrub I can scroll forward if I want to scrub back this little editing wheel is very useful and I can just let it hang pause it it just works so much easier than using a keyboard now the beautiful thing is that this doesn't necessarily need to replace your keyboard this is more of an extension to your keyboard just like the mouse now something interesting in my situation is where Connor is doing most of my editing and I'm doing the color grading part he uses the keyboard for the most part but sometimes wishes that there were certain shortcuts or features on the keyboard that just don't exist this is where the loupe tech creative tool comes into place because he doesn't really have to fully commit to an editing panel he can use this whenever he needs it and it's just an extension where for me I use this the most time and I can all so create custom workflows for me and he can create his own and we can both use this without having to really kind of push things aside so let's go ahead and jump into the color workspace because I feel this is where it really shines for me so you'll notice if I push on shadows the large wheel changes if I push on mid-tones and highlights it dynamically changes so what this allows me to do is it allows me to just have this smaller configuration without having a bunch of wheels and I can again dynamically changes so for example I feel like my highlights are a little overexposed so I can just tone this down a little bit and then there we go that looks a little bit better my mid-tones I can bring that up a hair and you'll notice that it starts to change these and it makes it really simple now if I wanted maybe a little bit more orange let's say for example I wanted more of an orange look I can use my finger this is really cool and I want you guys to see this in fact let me just switch this over to the color wheels so you see my mid-tones when I move my my finger around this almost acts like the mouse cursor but I can really pinpoint where I want it so for example if I want more of a let's just say orange look I can do that here I could just move that here if I want something a little bit more blue I can just move my finger here there it goes and that's really cool if I want a reset just double tap and it resets everything so now as I mentioned the customization on the loop that creative tool is just unreal like you can do just about anything so I'll jump back into the loop to configuration and you'll notice here when I'm in my editing panel one thing I didn't say is you can actually also have gestures for this larger wheel so for example if I push on this and let's say I want shadow tint when I'm in my editing tool you'll notice you just jump right here go back to editing so I'll go to editing and then you'll notice if I gesture it goes back to shadow tint so you can customize literally everything so going back into the loop to configuration you have your dials which you can change you can you have the touch part which is up here the wheel all of the round little circular buttons and obviously the square buttons and you can customize this and not only for Adobe Premiere as I mentioned you can do Final Cut Pro illustrator lightroom classic Photoshop and even the system Mac so for example if I just pretty much closed all this and go here I can use this for volume controls I almost want to say this is like an extension to your Mac but like on the touch bar side so even if you're using let's say for example Google Chrome you can add new tabs you can create shortcuts and just do a lot of different things so it's just a very useful tool not only for editing but also other applications too now one thing I did notice is the build quality feels very premium I would say even a step up from the loop tech plus something I really like is like the feedback you get with the dials you can really feel the little click enos the knob when you're scrolling I like that I mean this is something that you don't get with a keyboard so it's nice to have all of the buttons everything the tactile feedback I think is great I also like the fact that they do have a USB type-c for power that's actually a welcome upgrade so some final thoughts I really love the user interface the customization that the loop that creative tool offers I don't feel like it's a one-size-fits-all solution like most editing panels out there and I love the fact that it will adapt to your needs and your workflow I think that's really the key point here if you guys have any questions regarding the loop tech creative tool hit me up in the comments section down below I will leave more information in the description my name is Armando thanks again for watching you guys will catch me in the next one adios [Music] you
6. RAVEN – Multi Touch Control Surface for DIGITAL PERFORMER
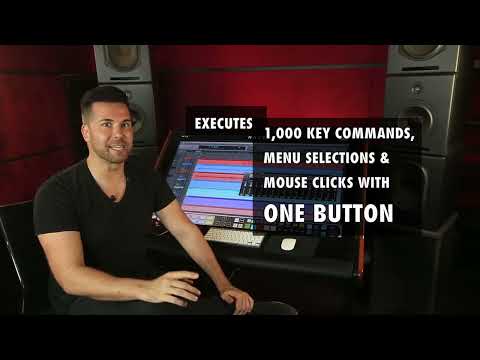
[Music] [Applause] foreign slate and I'd like to introduce you to Raven 3.0 for digital performer [Music] now let me show you some of the incredible features when using the Raven consoles with digital performer if you're using a different Daw click here to view our other supported Daw videos let's begin [Music] foreign [Music] software gives you access to 24 100 millimeter multi-touch faders with instant response on its Ultra slick and smooth Nano Glide surface banging to more tracks is just a swipe of the finger and I have direct access to multi-touch pans above my channels when using the Raven mixer I can grab a fader and then move my finger off of it and still maintain control then I can grab more faders across the console and have control over those as well never having to leave The Sweet Spot of my mixed position I can swipe solos and mutes and even skip underneath the tracks I don't want to include just as easily [Music] in modern workflow so much of our volume automation relies on small and precise moves like half DB rides on a vocal The Raven solves this problem with a feature known as fine faders this mode quadruples the resolution of the faders and allows you to move your finger a greater distance while confining the actual fader range to tenth of a DB increments the speed of the response can easily be changed to the range of scale that fits your needs [Music] the mouse and keyboard are great tools for editing but when you add in touch it becomes way more powerful The Raven allows users to directly touch their audio on the edit window incorporating the ability of touch along with the mouse and keyboard will increase the speed of your routine processes exponentially you can incorporate both hands when moving through selections of audio and using the nav pad you can quickly navigate through sessions by scrolling up down left and right you can also use the zooming buttons to increase and decrease the size of the audio on the edit window [Music] when drawing in automation your finger becomes the pencil tool it's now so quick and convenient to draw in the changes you want [Music] to add a plugin I'll touch and insert and navigate through the plugin menu here as an example I can navigate to the Slate digital Tab and double tap my virtual mix rack on the list once selected the plug-in loads and I make my adjustments you don't have to turn any generic logic controller knobs you don't have to map out any of the plug-in parameters you just load the plug-in and tweak the actual controls [Music] if you prefer to work on the arrange window while mixing we've included the floating mixer which makes it easy to have multi-touch faders and the arrange window open simultaneously we've also included the floating toolbar and Essentials palette to make accessing more tools even easier [Music] users have easy access to a multitude of Raven toolbars filled with powerful touch tools designed specifically for your Daw the flip toolbar button will allow you to shift your displayed toolbars with the other customized toolbars within a particular layout your console ads are also completely customizable using the customize toolbar button you can create and design your own console layouts once you've customized your console designs you can save them to layouts which can then be selected and recalled via the Raven toolbar and finally you can save a raven session file to store all of your layout changes into one easy file [Music] thank you one of the most powerful features within the Raven software is called the batch command system the batch command system is your new virtual assistant it can execute up to 1 000 key commands menu selections and mouse clicks from a single button and the Raven comes with a hundred preset batch commands per Daw but users can also completely customize record and save their own batch commands too let's create our own batch command to automatically create a new aux track and send I'll push and hold on an empty batch command now I'll hit the record button to record my process first I'll click the send in this channel strip and type the word new then to use the stereo option I'll type cursor down on the keyboard and then cursor right to open the bus list now I'll type bus spacebar and then the number 11 and I'll hit return now I'll hit record again to stop the recording and I'll name it new auxbus 11 to send one I'll confirm the newly recorded batch command and put it into action we have also created over 100 preset batch commands for you within the Raven software I'll show you a few of my favorites [Music] it's easy to create new tracks and then instantly name them watch me create four new audio tracks with this button then I'll option touch the top track and hit this button to name them lead vocals one through four [Music] applying plugins directly to sound bites is so easy using this batch command I can throw on one of my preset EQ adjustments for a telephone effect to my sound bite now let's select this sound bite and instantly reverse it I hit one button and it loads and applies the reverse to my selection adding custom plugins and plug-in chains is quick and simple with the batch commands watch me add my go to vocal plug-in chain to this lead vocal track here and it's just as easy to remove all the plugins as well with the clear inserts batch command [Music] your Raven software also comes with the Slate remote this IOS app allows users to automatically synchronize their batch commands to their iPhone or iPad the remote can be great for stepping back to gain perspective on a mix while still maintaining control of your transport or it can simply be used to control your session without having to be near the workstation this is great for engineers who are recording their own music in a separate room from the main system The Raven takes away the tedious task of being a technician in the studio and allows you to be an artist a creative there are no more obstacles between you and your craft click here to find your local Raven dealer foreign
7. How to: Logic Pro Tutorial #10 Configure Your Control Surface with Logic Pro – Part 1
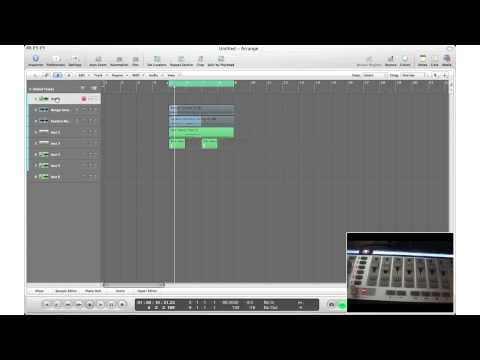
what's up YouTube it's Adam from I'm a music mogul and savor and talk about how to configure your control service with logic now flag I 206 pointed out if I can make a video and sure we do it right now now the video could get a little extensive and a little crazy at times but I'm sure you'll get it you should be able to set up the controller fully within half an hour to an hour after watching this video and finally and get your controller to control logic the way it's supposed to be and the way you want it to be so what I'm going to do in this video I'm going to set up all my faders set up all these knobs to control different instruments and set up other buttons so I can flip between different instruments within logic and also set up my transport controls now it might sound a little too much right now but it's pretty easy once you get it it's easy you'll understand it and again you'll be up fairly quickly to have a controller play nice with logic let's get let's get to and set up our transport controls first alright let's set up our transport controls now what our transport controls is the play stop fast-forward rewind record section on our control surface it's very simple to setup and easy just like it is the sine of any shortcuts on your keyboard let's hit option K on our Apple keyboard up here in the search menu hit type in play and the first one that you get should be this one which is play hit new learn new assignment hit the play button on your control surface so now that we got the play working let's get our stop working so here stop right under it hit learn new assignment hit the stop button on your control surface and now we'll learn to stop so now let's play and stop as you can see we got that working let's set up our record button so here's record hit learn new assignment hit the record button on your control surface and now we are recording alright just keep following those steps to do the fast forward rewind loop and whatever controls buttons you have there you can keep adding it here if you don't know where it is here just type it in the search menu of what you're looking for and it should come up and just click it hit learn new assignment and hit the button on your control surface and you should be up and running and ready to go with your transport controls fully out and right here to go within about a minute now let's move on to our faders all right so now let's get to our faders this window right here is the controller assignments window let me just hit Apple K to bring it up again up okay to bring up a controller assignments window this is where we'll be adding and editing all of your parameters within your keyboard and logic let's hit up okay so again it's our controller Simon's window as you can see I already have mine set up now it's not the full set up because I actually deleted it so I can refresh my memory on how to do this forth YouTube tutorial and when I'm done this and then I get back and now reprogram my keyboard but that's okay I'll do it and do it for you guys so here in this zone is basically your keyboard that you are selected on so let's create a new keyboard and we'll call it this one it's innovations I'm going to call innovation and now we've got our keyboard selected in our mode this is basically one mode your keyboard is in so this is going to be I'm going to call it fader mode because we're going to set up our faders so let's go here to the plus button and type in faders alright now you're ready to start assigning these faders to faders within logic let's do it go to learn mode move this window side so we can see what what we're doing hit X on your keyboard to bring up your mixer window and let's start moving some faders now to control this fader just click on the parameter you want to move which is fader 1 and I'm going to adjust fader 1 on my keyboard so that learnt it fader to a 3 fader for fader 5 fader 6 Fator seven and Fator eight so now I got all my faders hoop fader eight be sure to when you're finished setting it up before you start moving the other faders to test it take off the learn mode here in the bottom right corner I always forget to do that and now you can see that all your faders are working alright so we just set up our fader mode which is basically our faders in mixer mode on our control surface but usually when we are pretty much recording our music we want to have single fader instruments that we can adjust right there and then as we're recording it into logic so how do we do that well we'll create another mode first let's hit our I key on our Apple keyboard just bring up the inspector mode hit app okay on our keyboard - we have our controller assignments and let's create a new mode I'll call it single fader mode so that's our single fader and go to learn mode select the single fader in the inspector window on the side of logic and move the first fader or whichever figure you want for it to be in single fader mode so now every time I will select another instrument you can see that the fader I can move it all right so now let's set up some instruments in logic and have our controller control it let's bring up at exs24 instrument hit Apple key on our keyboard type the controller assignments window in the mode section go to new because we're going to create a new mode for a keyboard to understand that's called exs24 and let's start having controller learn some new things go in the learn mode and start turning stuff so again you click what you want turn and then you turn the actual physical knob auto controller so click turn click turn click turn obviously you guys will be turning the actual knobs that you actually want to match your workflow right now I'm just turning random ones just for the sake of the tutorial so I finished control turning hind hubs for exs24 I'm going to turn off the learn mode let's see if it actually picked up all the information word my XS CO and I'm going to make sure it worked it looks like it did now let's create another one for another instrument so in modes go new we'll create one for an e sm instrument bring up an e sm instrument on in logic hit learn mode go to the instrument and start turning things click turn I'm sure by now you already get this alright I finished controlling all the stuff click off learn mode and now let's see if it actually worked what I did just to double check always double check and it looks like it did now the key thing here is to I didn't do it here but the key thing here is to always have one knob control the same thing so let's say this is cut off attack decay sustain release always keep the same knob in any instrument to control the same parameter as workflow would be easier and easier for you to understand as you are recording that's a little tip right there alright so now wouldn't it actually be nice if we can tell logic when and when when and where to use these parameters for what instrument so that is where the buttons come in place so when I have an ESM instrument brought up on the window I'm going to click this when I have an exs24 instrument brought up I'm going to click this and this will automatically turn to an exs24 instrument when I want to go in fader mode I'll click this and logic will know I am in fader mode to change the modes between that let's get to it and how to do it right now well you'll see right now let's get to it you
8. Production Switching & Flow Monitor Multiviewer: Use any control surface with any engine using AMPP

[Applause] [Music] hello my name is bob kreitz i work with grass valley as a demonstration artist on all video switchers what we're demonstrating here today is one aspect of amp which is very powerful it is called the flow monitor the flow monitor allows me to take my multi-viewer from my virtual k-frame switcher and put it on this screen a lot of people think that initially that might be just a regular multi-viewer but the secret is that it is nothing more than a chrome tab running on this pc with this monitor as an extension with that one chrome tab only at eight megabits worth of bandwidth i'm able to get this high quality low latency signal back the virtual switcher in the cloud has its own built-in multi-viewer so that anybody in the world can see the same thing at the same time this allows the director to be in one city of the world and the technical director with the panel to be in another city of the world and because everything is time stamped do a live production and to do it quickly with low latency the biggest message that we like to send about this panel is that it is connect in other words connect existing hardware that can be used either for a virtual switcher in the cloud or a chassis on premise and to change that as easily as going in and changing the ip address allows a production team to work with a hardware chassis in the morning and to work with a virtual cloud in the afternoon it allows operators who are used to this type of gui to bring their show files sit down and start operating in the exact same fashion they're used to already thank you for your time and be sure to check us out on our web page [Music] you
9. GV Ignite Automation Director 8.24.18

now on weg m2t news at ten well fall season is here tonight high school teams faced off on fields across the state and next week Alabama and Auburn start their seasons big events highly anticipated by big audiences according to ESPN the Birmingham TV market is the number one local market for college football viewing in 2017 ESPN reported the highest TV ratings for games airing on that channel for 16 straight years but does that excitement translate to high schools across the country football participation is down W vtm 13s Erin Kelly is live at Spain Park High School in Hoover tonight Erin is Alabama seeing that trend - well there were certainly no lack of enthusiasm as Spain Park beat Hillcrest in the first game of the season tonight and parents we talked to said despite what the numbers may show the sports popularity is at an all-time high the scene plays out every fall Friday across Alabama if you grew up in Alabama and you played the game you know there's nothing better than football on a Friday night or a Saturday but according to a report released today the number of high school students playing football nationwide has dropped seven percent since 2009 Alabama stats have fluctuated showing more than 30 thousand eight hundred athletes last season an increase of about 400 from the season before that but the data shows when compared to the 2015 season participation has dropped by more than seventeen hundred athletes I see the injuries I see the students trying to balance multiple sports so sometimes you just have to decide what's more important and what your passion is it's very competitive and you know it's harder for kids to just go out and play for the love of the game it's there's a tremendous amount of dedication that has to be involved and some parents say you know it's also important to talk about the danger of head injuries but they feel that coaching and officiating has improved to the point that has made the sport safer live in Hoover Erin Kelly W ETM 13 we're getting a better look at what led to a crash that ended with a Corvette in a convenience store check out this surveillance video you can see that car skidding down Bankhead highway causing smoke the Corvette then rotated before slamming into the Chevron station yesterday the owner of that Chevron shared this video saying it came from a business across the street the driver wasn't hurt a Gate City shooting left a person with serious injuries it happened tonight around 5:30 on sixty-fifth court way south police say the victim was taken at UAB hospital the suspected shooter is in custody new tonight a Birmingham man found guilty of capital murder for the death of his common-law wife a jury returned a decision for cedric Norrish yesterday a prosecutors say Norris shot coral Wilson and four of his children in May of 2016 the kids survived Norris is sentencing is set for October police arrested a teske loose a couple on child abuse charges our partners at the Tuscaloosa news report James and Suzanne Turner have been freed after posting bond investigators say the arrests stem from relatives complaints of neglect officials say two children weren't being fed properly and the youngest child had lesions from wearing soiled diapers still no arrests a year after a young man was shot and killed on a Birmingham Street James Hendrix was found with multiple gunshot wounds outside a home on Imperial Drive his mother says they need to find who did this so the family can have closure today she returned to the same spot where her son was killed it's very tough because they always gonna bring back that memory or my son but I know as a mother God gave me strength to come back that's what bleiel to come back and do something police haven't announced any arrests or developments in the investigation we now know the name of an undocumented immigrant accused of trying to kidnap a woman in a Jasper Park Bernardo Castro Gabrielle is behind bars tonight charged with attempted kidnapping and enticing a child a woman managed to escape after a man pulled into the ground and tried to put her in a car police say the suspect is from Guatemala and has been in the country for four to five years jasper's police chief says safety is their top priority the city is determined we're gonna make it as as safe as possible we have increased patrols in the areas and our officers getting out and walking the parks Castro Gabrielle is in the Walker County Jail on a million dollars bond police are looking for this Tuscaloosa County woman who you see behind the counter at a Brookwood convenience store police say not only did Amanda green steal cash from a safe they say she also took money from a donation jar meant to help with funeral expenses for a regular customer as far as you know somebody raising money for a funeral my god you know what's this world coming to is just unreal Brookwood police say they've been to green's home and other places she visits but have had no luck finding her new tonight Mobile County settled a lawsuit with a former inmate paralyzed during a fight with a corrections officer the county's attorney says they settled with Brandon Jeffries for $800,000 Jeffery was living at a mental health facility in 2015 when he was arrested and charged with assault he fought with corrections officers while in jail and was paralyzed from his injuries a warning tonight a Birmingham woman looking for a job at the Amazon distribution center coming to Bessemer encountered a scammer trying to get her personal information the Better Business Bureau says she searched Google but the number that came up was not for Amazon she first gave the person she called her bank account number and remote access to her computer when she realized it was a scam she unplugged a computer and called the Better Business Bureau a spokesperson tells us they've seen similar scams involving big tech companies like Amazon and Netflix a lot of scammers are putting fake tech support numbers and paying for them to show up higher in search results and search engines so the best thing you can do is go to the tech companies actual website and look for a number there and not search the Better Business Bureau also warns to never give anyone remote access to your computer as for the Bessemer distribution center no jobs have been posted when they are they'll be on line-in amazon force.com dozens of scooters are off the streets of Tuscaloosa because the city says the rental company failed to apply for a business license we found 70 scooters in the police departments impound lot when we stop by this afternoon the city says it will continue collecting them until things are worked out now it is illegal in the city to be to operate scooters even bikes on pedestrian sidewalks we reached out to Byrd the company that rents the scooters and were waiting to hear back answers tonight for some Bessemer parents who say their children's bus stop was abruptly canceled the superintendent's office says those stops will be back in service Monday for routes from Charles F hard elementary school were eliminated last week but dr. Keith Stewart says they were able to find substitute drivers to pick up the kids a move to save money or keep minorities away from the polls that was a debate surrounding a proposal to close nearly all of the polling places in a predominantly black County in Georgia the Randolph County Elections Board voted against the plan that would have closed seven of nine voting locations County officials say an independent consultant recommended the consolidation to save money critics raised questions about the timing during a hotly contested race in which Democrat Stacey Abrams is seeking to become Georgia's first black governor we fought very hard to have the opportunity to vote and now the time that have come so they can vote and their rights are being taken away the consultant argued the Secretary of State highly recommended consolidation he has since been fired the midterm elections are on November 6th only 73 days away we have important information including a list of all elections sample ballots and more just download the wvt m13 app senator doug jones is repeating his call to hit the pause button on confirmation hearings for Supreme Court nominee Brett Kavanaugh the Alabama Democrat said today he wants to see the full documentation from Cavanaugh's work in the White House the National Archives estimates that will take until October but Republicans want to hold hearings in September president Trump's longtime finance chief has been granted immunity in the federal investigation of former Trump lawyer Michael Cohen prosecutors say Alan weiselberger signed off on a Cohen invoice for legal services that were actually was actually reimbursement for money paid to stormy Daniels Weissenberg has been a trump confidant who started working for the family in the early 1970s President Trump says that he's directed Secretary of State Mike Pompeo to delay a trip to North Korea the president feels there's not enough progress on denuclearization he tweeted he doesn't believe China is helping with the effort to rein in North Korea because of more pressure by the US on trade with China tonight tributes and prayers pouring in from all over the country for Senator John McCain the Arizona Senators family announced today he would no longer seek medical treatment for an aggressive form of brain cancer his colleagues in Congress are recalling McCain's lifetime of service the years he spent as a POWs in Vietnam and the respect he's garnered in the Senate as a national leader and he has fought cancer tirelessly and with every bit as much passion and energy as he fought for freedom and for his principles in the Senate Alabama Senator Richard Shelby issued a statement saying my wife and I are thinking about John McCain and his family during the sad difficult time a heads-up tornado sirens will be selling off across Jefferson County next week the County EMA says it'll be checking how the new polygon activated siren system is working this map shows what dates and times those sirens will be sounding when the new system goes online only impacted areas will hear sirens during a storm versus the entire county tonight there's a celebration of independent films in Birmingham movie lovers are kicking off the 20th annual Sidewalk Film Festival it includes showings of about 260 films over three days they'll be playing at ten venues like Alabama theater the lyric theater and first church Birmingham we really work to cover all the genres so if you are a big science-fiction fan we've probably got you covered if you like dark comedy got yet if you wanted that hard-hitting documentary we've got a whole lineup of those more than 150 filmmakers from around the country are expected at this festival if you'd like to attend all of the details are on our app what a fool your friends into thinking you're a Globetrotter there's an app for that yeah it's called chrome studio and it connects with professional graphic designers for expert editing and since sherry and I just did a promo shoot for the station I sent them this photo and take a look at what they did they sent us to Paris we gave sherry a nice new purse and a couple of Berets for us I love it like that and here looks like we're getting married or something nicer well I know pinnacle Gardens I asked guy earlier I'm like is this a good Halloween costume or did you just tell them what you really think of me and beam me up Scotty not sure what the wolf has to do with anything but we had a little fun with that happens for free pretty funny a school bus up in smoke who helped dozens of kids escape the inferno plus a security guard on the sidelines recording a struggle instead of stepping in to help you're watching WV TM 13 News
10. Mixcraft 7 Control Surfaces: Mixcraft Remote Mobile App
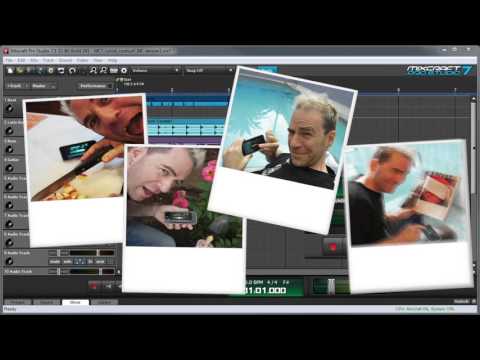
mixcraft remote is a free mobile app for Android or iOS devices that let you control mix crafts transport and other functions wirelessly from your phone or tablet you can download it from the Google Play Store or the Apple App Store in this video I'm using an iPhone 5 but mixcraft remote works identically on Android or iOS platforms once mixcraft remote is installed in your mobile device we'll set up mixcraft to respond to it on your computer start by clicking the file menu and select Preferences now select control surfaces where it says add new click on this little down arrow right here select make scratch remote and press ok double check to your mobile devices on the same wireless network as your computer then start the mixcraft remote app on your phone or tablet mixcraft remote should automatically pair with your computer now you can use mixcraft wirelessly from anywhere near Wi-Fi networks range here are the mix scratch functions you can control to begin with their standard transport controls you can hit the play button or stop or you can move the playhead up here with the fast-forward buttons or rewind or you can move the playhead all the way to the beginning or to the end and of course you can record with the record button if you decide you don't like what you've done you can hit the undo button or if you decide you do like it you can hit the redo button and you can also switch the song position display over here between beats and time right now it's in beats and I can press the time button and now it shows time you can also quickly jump to any position in your songs by clicking on the time display and move this slider you can hide the slider by clicking on the time display again finally the master volume and display meter are replicated